
ABsmartly MCP Server
A Model Context Protocol server that provides full access to the ABsmartly experimentation platform through the CLI core library — 230+ commands across 33 groups including experiment lifecycle, metrics, goals, teams, and more.
Quick install for Claude Desktop
Download and double-click the file to install. For other clients (Cursor, VS Code, Windsurf, ChatGPT, Claude Code), see Setup below.
How It Works
The server exposes 4 tools that give AI assistants access to the full ABsmartly CLI:
"What experiments are running?"
  → discover_commands(group: "experiments")
  → execute_command(group: "experiments", command: "listExperiments", params: {state: "running"})
Setup
Authentication Methods
The MCP server supports two authentication methods:
Option 1: Claude Desktop
With OAuth (recommended)
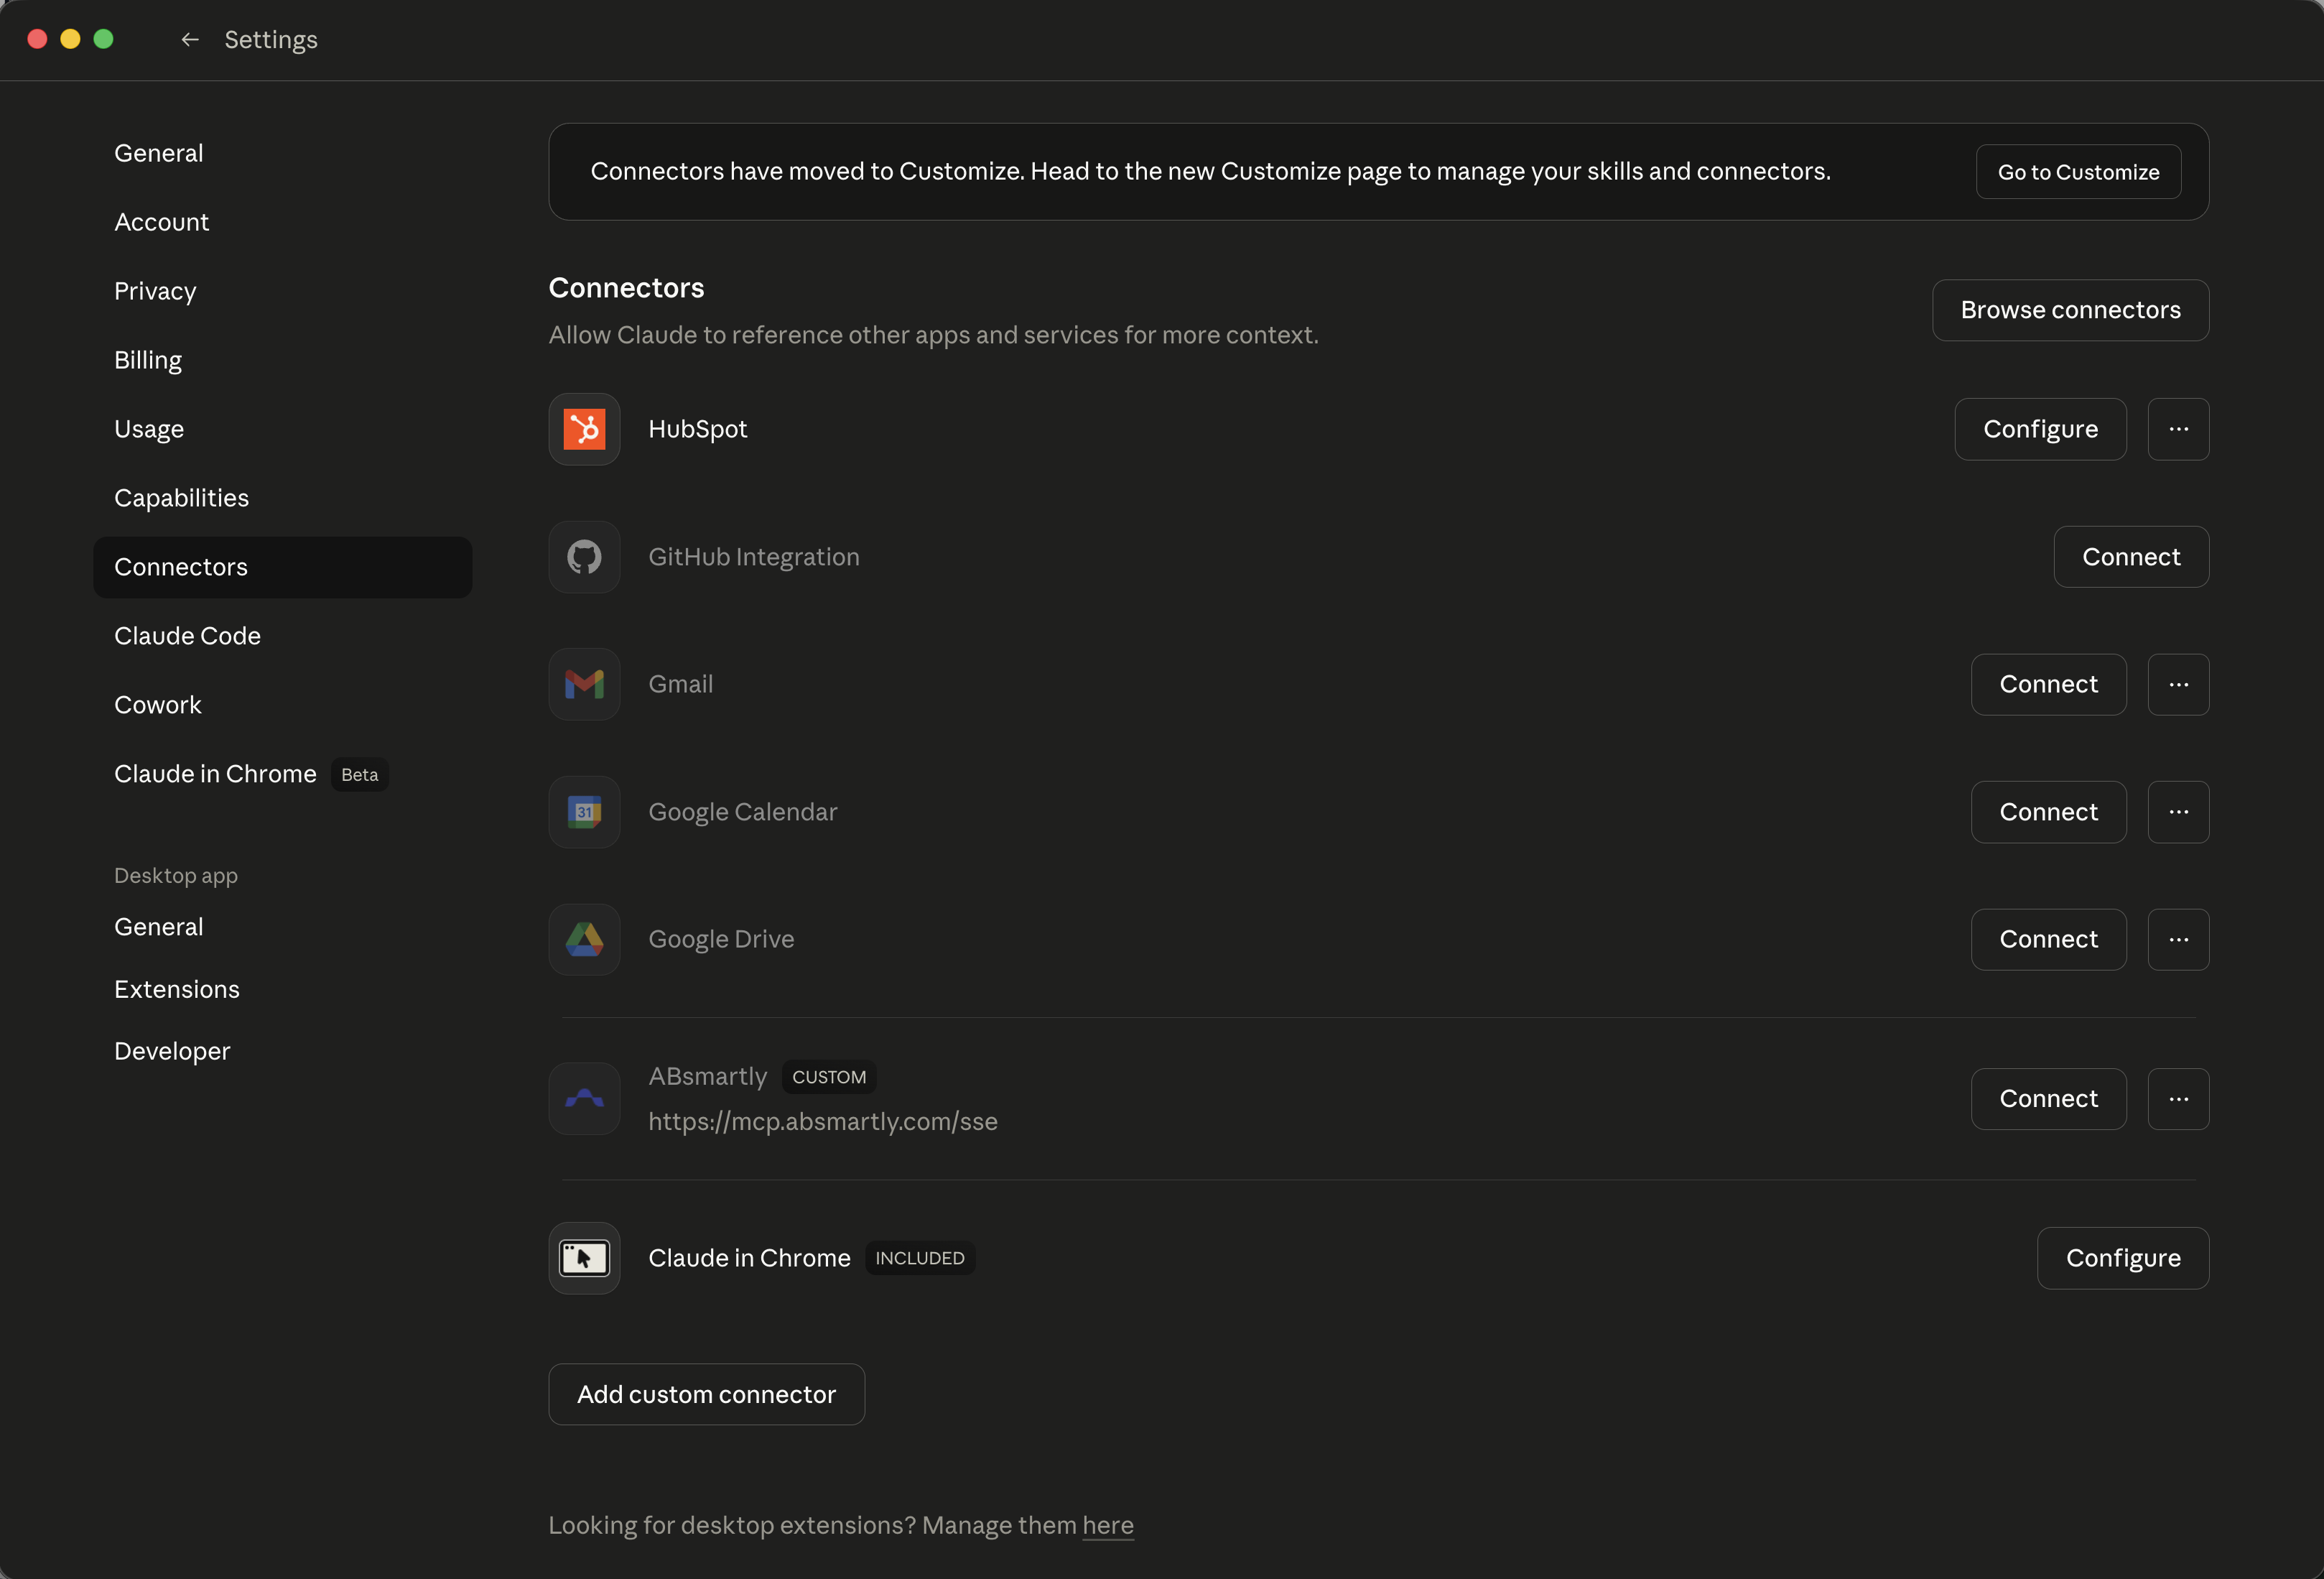
Open Settings → Connectors, scroll to the bottom, and click Add custom connector:
In the dialog, give the connector a Name (e.g. "ABsmartly") and paste the URL into Remote MCP server URL:
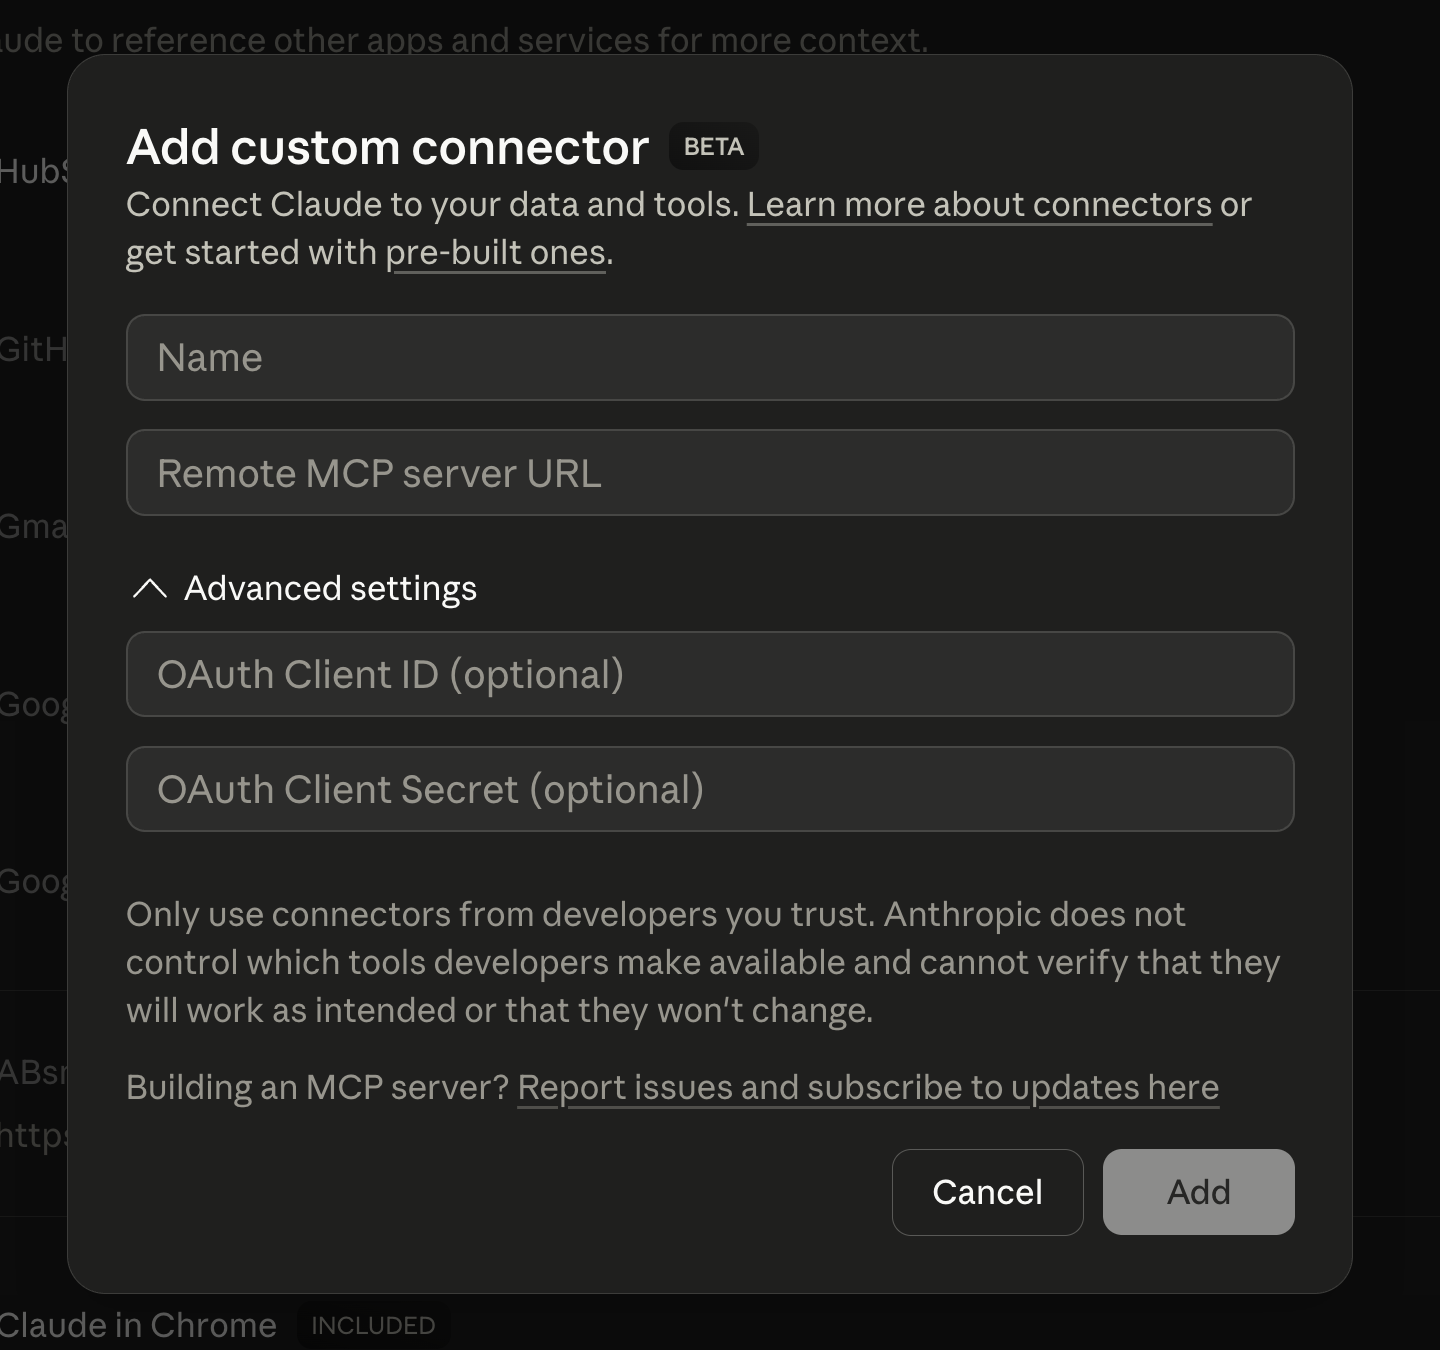
URL:
https://mcp.absmartly.com/sse?absmartly-endpoint=https://your-instance.absmartly.com
Click Add, then Connect. Claude Desktop will open your browser for ABsmartly login (SAML/credentials). After authentication, the MCP connection is established automatically.
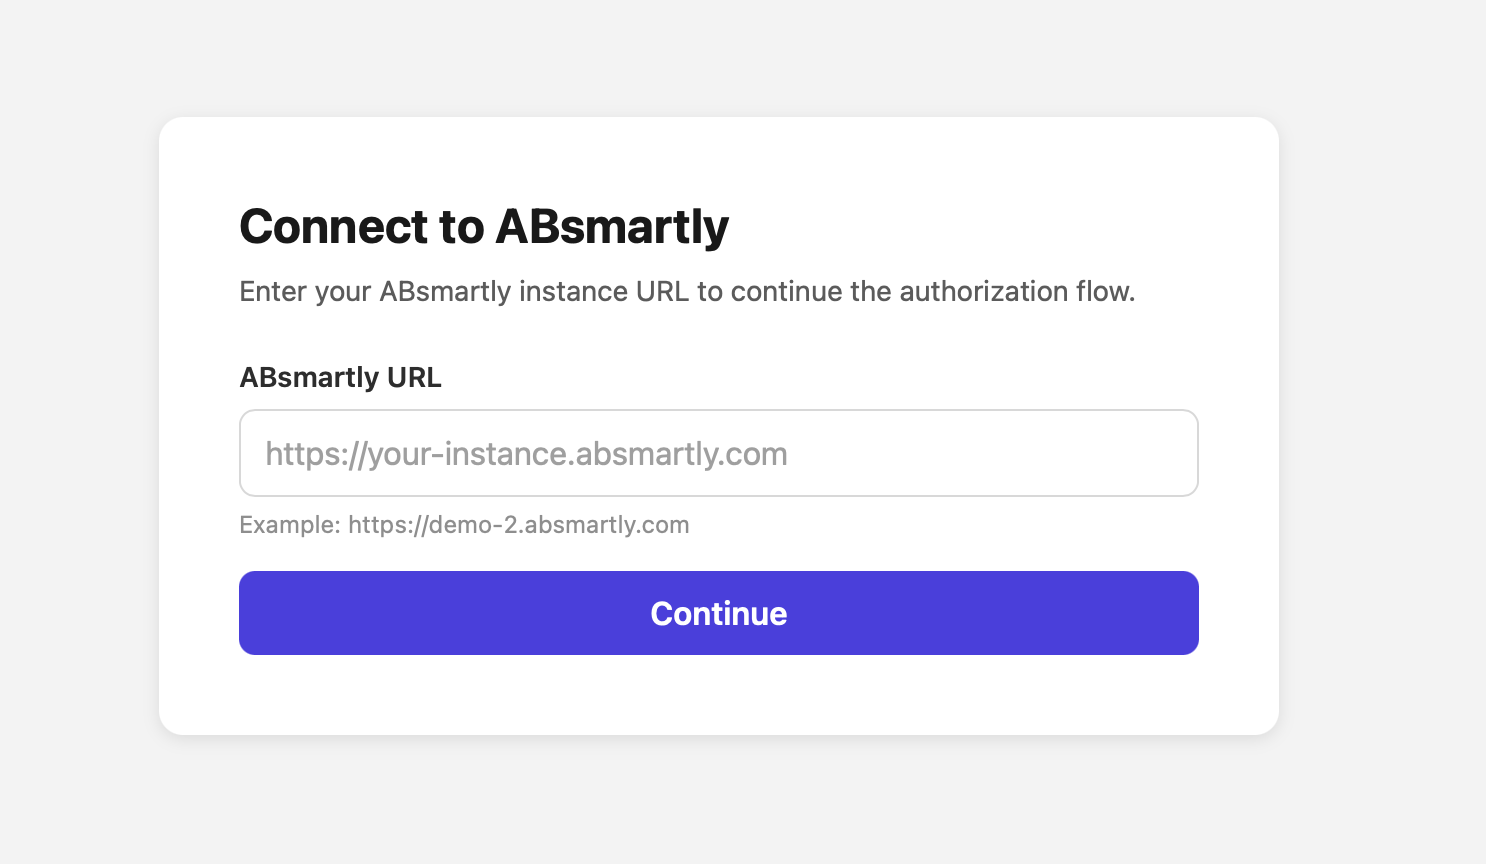
The
absmartly-endpointquery parameter is optional. If omitted, the OAuth flow will prompt you to enter the URL of your ABsmartly instance in the browser before login:
With API Key
Pass the API key directly in the URL — no mcp-remote bridge needed:
URL:
https://mcp.absmartly.com/sse?api_key=YOUR_API_KEY&absmartly-endpoint=https://your-instance.absmartly.com
With API Key (via mcp-remote)
If you'd rather pass the key via headers instead of the URL, use the mcp-remote bridge — Claude Desktop doesn't support custom headers natively for remote servers:
~/Library/Application Support/Claude/claude_desktop_config.json (macOS):
{
  "mcpServers": {
    "absmartly": {
      "command": "npx",
      "args": [
        "mcp-remote@latest",
        "https://mcp.absmartly.com/sse",
        "--header", "Authorization:YOUR_API_KEY",
        "--header", "x-absmartly-endpoint:https://your-instance.absmartly.com"
      ]
    }
  }
}
With Local Server (stdio)
Uses your ABsmartly CLI config and macOS Keychain credentials:
{
  "mcpServers": {
    "absmartly": {
      "command": "npx",
      "args": ["@absmartly/mcp", "--profile=production"]
    }
  }
}
Option 2: Claude Code
Remote with API Key
claude mcp add --transport sse --scope user absmartly \
  https://mcp.absmartly.com/sse \
  -H "Authorization:YOUR_API_KEY" \
  -H "x-absmartly-endpoint:https://your-instance.absmartly.com"
Subdomain shorthand — auto-constructs https://<subdomain>.absmartly.com/v1:
claude mcp add --transport sse --scope user absmartly \
  https://mcp.absmartly.com/sse \
  -H "Authorization:my-subdomain YOUR_API_KEY"
Remote with API Key (Streamable HTTP — recommended for new installations)
claude mcp add --transport http --scope user absmartly \
  https://mcp.absmartly.com/mcp \
  -H "Authorization:YOUR_API_KEY" \
  -H "x-absmartly-endpoint:https://your-instance.absmartly.com"
Streamable HTTP is the modern MCP transport (the MCP spec deprecated SSE in March 2025). The
/sseURL still works for older clients.
Remote with OAuth
claude mcp add --transport sse --scope user absmartly \
  "https://mcp.absmartly.com/sse?absmartly-endpoint=https://your-instance.absmartly.com"
Then run /mcp in Claude Code to authenticate when prompted. The absmartly-endpoint query parameter is optional — omit it and the OAuth flow will prompt you for the instance URL in the browser.
Local Server (stdio)
claude mcp add --scope user absmartly -- npx @absmartly/mcp --profile=production
Project Config (.mcp.json)
{
  "mcpServers": {
    "absmartly": {
      "type": "sse",
      "url": "https://mcp.absmartly.com/sse",
      "headers": {
        "Authorization": "YOUR_API_KEY",
        "x-absmartly-endpoint": "https://your-instance.absmartly.com"
      }
    }
  }
}
Use --scope project instead of --scope user to write to .mcp.json (shared via VCS).
Option 3: Cursor
Click the badge above to install with one click (OAuth). After Cursor prompts you for the ABsmartly instance URL in the browser, the flow completes automatically. Or configure manually:
With API Key
.cursor/mcp.json (project) or ~/.cursor/mcp.json (global):
{
  "mcpServers": {
    "absmartly": {
      "url": "https://mcp.absmartly.com/sse",
      "headers": {
        "Authorization": "YOUR_API_KEY",
        "x-absmartly-endpoint": "https://your-instance.absmartly.com"
      }
    }
  }
}
Or with Streamable HTTP transport (modern, recommended):
{
  "mcpServers": {
    "absmartly": {
      "type": "http",
      "url": "https://mcp.absmartly.com/mcp",
      "headers": {
        "Authorization": "YOUR_API_KEY",
        "x-absmartly-endpoint": "https://your-instance.absmartly.com"
      }
    }
  }
}
With OAuth
{
  "mcpServers": {
    "absmartly": {
      "url": "https://mcp.absmartly.com/sse?absmartly-endpoint=https://your-instance.absmartly.com"
    }
  }
}
Cursor will detect the OAuth requirement and open your browser for login. The absmartly-endpoint query parameter is optional — omit it and the OAuth flow will prompt for the instance URL.
Local Server (stdio)
{
  "mcpServers": {
    "absmartly": {
      "command": "npx",
      "args": ["@absmartly/mcp", "--profile=production"]
    }
  }
}
Option 4: Windsurf
~/.codeium/windsurf/mcp_config.json:
With API Key
{
  "mcpServers": {
    "absmartly": {
      "serverUrl": "https://mcp.absmartly.com/sse",
      "headers": {
        "Authorization": "YOUR_API_KEY",
        "x-absmartly-endpoint": "https://your-instance.absmartly.com"
      }
    }
  }
}
Note: Windsurf uses
"serverUrl"instead of"url".
Or with Streamable HTTP transport:
{
  "mcpServers": {
    "absmartly": {
      "serverUrl": "https://mcp.absmartly.com/mcp",
      "headers": {
        "Authorization": "YOUR_API_KEY",
        "x-absmartly-endpoint": "https://your-instance.absmartly.com"
      }
    }
  }
}
With OAuth
{
  "mcpServers": {
    "absmartly": {
      "serverUrl": "https://mcp.absmartly.com/sse?absmartly-endpoint=https://your-instance.absmartly.com"
    }
  }
}
Local Server (stdio)
{
  "mcpServers": {
    "absmartly": {
      "command": "npx",
      "args": ["@absmartly/mcp", "--profile=production"]
    }
  }
}
Option 5: VS Code (GitHub Copilot)
Click a badge above for one-click install (OAuth). You'll be prompted for your ABsmartly instance URL in the browser. Or configure manually:
.vscode/mcp.json (workspace) or via Command Palette → MCP: Open User Configuration:
Note: VS Code uses
"servers"as root key, not"mcpServers".
With API Key
{
  "servers": {
    "absmartly": {
      "type": "sse",
      "url": "https://mcp.absmartly.com/sse",
      "headers": {
        "Authorization": "${input:absmartly-api-key}",
        "x-absmartly-endpoint": "https://your-instance.absmartly.com"
      }
    }
  },
  "inputs": [
    {
      "type": "promptString",
      "id": "absmartly-api-key",
      "description": "ABsmartly API Key",
      "password": true
    }
  ]
}
Or with Streamable HTTP transport (recommended):
{
  "servers": {
    "absmartly": {
      "type": "http",
      "url": "https://mcp.absmartly.com/mcp",
      "headers": {
        "Authorization": "${input:absmartly-api-key}",
        "x-absmartly-endpoint": "https://your-instance.absmartly.com"
      }
    }
  },
  "inputs": [
    {
      "type": "promptString",
      "id": "absmartly-api-key",
      "description": "ABsmartly API Key",
      "password": true
    }
  ]
}
With OAuth
{
  "servers": {
    "absmartly": {
      "type": "sse",
      "url": "https://mcp.absmartly.com/sse?absmartly-endpoint=https://your-instance.absmartly.com"
    }
  }
}
VS Code will detect the OAuth requirement and show an Auth CodeLens to trigger the flow. The absmartly-endpoint query parameter is optional — omit it and the OAuth flow will prompt for the instance URL.
Local Server (stdio)
{
  "servers": {
    "absmartly": {
      "command": "npx",
      "args": ["@absmartly/mcp", "--profile=production"]
    }
  }
}
MCP tools only appear in Agent mode in VS Code, not in Ask or Edit mode.
Option 6: Gemini (CLI + Code Assist)
Works for Gemini CLI (terminal) and Gemini Code Assist (VS Code / JetBrains / Android Studio agent mode). Both read ~/.gemini/settings.json (user-wide) or .gemini/settings.json (per-project). JetBrains IDEs use mcp.json instead.
With OAuth
{
  "mcpServers": {
    "absmartly": {
      "url": "https://mcp.absmartly.com/sse?absmartly-endpoint=https://your-instance.absmartly.com"
    }
  }
}
Gemini auto-discovers the OAuth requirement. In Gemini CLI, run /mcp auth absmartly when prompted; in Code Assist agent mode the browser opens automatically.
With API Key
{
  "mcpServers": {
    "absmartly": {
      "url": "https://mcp.absmartly.com/sse",
      "headers": {
        "Authorization": "YOUR_API_KEY",
        "x-absmartly-endpoint": "https://your-instance.absmartly.com"
      }
    }
  }
}
One-liner via Gemini CLI
gemini mcp add --transport sse --scope user absmartly \
  https://mcp.absmartly.com/sse \
  -H "Authorization: YOUR_API_KEY" \
  -H "x-absmartly-endpoint: https://your-instance.absmartly.com"
Gemini Enterprise (Google Cloud Console)
Gemini Enterprise's Custom MCP Server connector (Preview) requires Streamable HTTP transport — use the /mcp endpoint:
- Google Cloud Console → Gemini Enterprise → Data stores → Create data store.
- Search "Custom MCP Server" → Add MCP server.
- Server URL:
https://mcp.absmartly.com/mcp - Authentication: OAuth — register Gemini Enterprise as an OAuth client against your identity provider, then provide the
client_id/client_secret. Grant themcp:accessscope. - Save and wait for the connector status to become Active.
SSE transport (
/sse) is not supported by this connector. The legacy Gemini CLI / Code Assist sections above continue to use/sseuntil those clients add Streamable HTTP support.Reload the IDE window after editing settings (VS Code: Command Palette → Developer: Reload Window). MCP support in Code Assist requires agent preview mode — set
"geminicodeassist.updateChannel": "Insiders"in VS Code settings if not already enabled.
Option 7: ChatGPT (Developer Mode)
ChatGPT does not support one-click install deeplinks — you connect remote MCP servers via the Custom Connectors UI. Requires a Pro, Team, Enterprise, or Edu plan, and Developer Mode enabled (Settings → Connectors → Advanced → Developer mode).
- Go to Settings → Connectors → Create.
- Fill in:
- Name:
ABsmartly - MCP Server URL:
https://mcp.absmartly.com/sse?absmartly-endpoint=https://your-instance.absmartly.com - Authentication: OAuth
- Name:
- Save. In a new chat, click + → Developer mode → select the ABsmartly connector to add it as a tool source.
Workspace admins must first enable Custom MCP connectors in Workspace Settings → Permissions & Roles → Connected Data.
Option 8: DXT Extension
- Download from mcp.absmartly.com/absmartly-mcp.dxt
- Double-click to install in Claude Desktop
- Enter your ABsmartly endpoint when prompted
Authorization Header Formats
When using API key authentication, these header formats are all supported:
The subdomain shorthand auto-constructs the endpoint as https://<subdomain>.absmartly.com/v1.
Usage Examples
Discover what's available:
What ABsmartly operations can you help me with?
List running experiments:
Show me all running experiments
Create an experiment from a template:
Create a new A/B test called "checkout_cta_test" with Control and Blue Button variants
Full lifecycle:
Create an experiment, move it to ready, start it, then show me its details
Feature flags:
Create a feature flag called "dark_mode" and start it
Clone and modify:
Clone experiment 42 as "checkout_v2" and update the traffic split to 70/30
Compare experiments:
Show me the differences between experiments 42 and 43
Tools Reference
discover_commands
Browse available command groups or search by keyword. Call without parameters to see all groups.
{ "group": "experiments" }
{ "search": "archive" }
get_command_docs
Get detailed documentation for a specific command including parameters, types, and examples.
{ "group": "experiments", "command": "createExperimentFromTemplate" }
execute_command
Execute any ABsmartly command. Common commands are listed in the tool description; use discover_commands for the full list.
{
  "group": "experiments",
  "command": "listExperiments",
  "params": { "state": "running", "items": 10 }
}
Parameters:
group(required) — command group (e.g.experiments,metrics,goals)command(required) — command name (e.g.listExperiments,createExperimentFromTemplate)params(optional) — command parameters as JSON objectconfirmed(optional) — set totrueonly after the user has explicitly confirmed the action; never set it on your own initiativeraw(optional) — return full CommandResult with rows/detail/warnings/paginationlimit(optional) — max items for list operations (default: 20)
Parameter shape. Each command documents its params with get_command_docs. IDs are named after the entity (experimentId, goalId, keyId, ...), and create/update fields go in a data object using the API's field names (e.g. { "data": { "first_name": "Ada" } }). The server translates these to what each @absmartly/cli core function reads. Some notable shapes:
- Access commands (
grant/revoke…AccessUser/Teamon experiments, goals and metrics) take arole: an asset role ID or name (e.g."Editor"). Metrics useassetRoleId. - Datasource
testDatasource/introspectDatasource/validateDatasourceQueryandstorageconfigs.testStorageConfigtake the saved config's ID. The backend uses the stored secrets, so they never pass through MCP.testDatasourcealso accepts unsaved edits inconfig. - Insights,
activity.listActivityandevents.listEvents*take their filters as top-level params. Aparamsobject holding the same fields is still accepted but deprecated. platformconfig.get/updatePlatformConfigtakeconfigKey: the config's ID or name.
Deprecated params (still accepted, not shown in docs) are kept for callers written against 2.0.x.
Destructive actions (start, stop, archive, delete) require confirmation. The server returns a confirmation prompt; only after the user has explicitly confirmed should you call again with confirmed: true to proceed.
Experiment creation from templates also requires confirmation. The first call to createExperimentFromTemplate returns a preview — the resolved API payload (with names mapped to IDs) plus any warnings — without creating the experiment. Show the preview to the user, and only after they have explicitly confirmed should you call again with confirmed: true to actually create.
Creating Experiments with Templates
The recommended way to create experiments is with markdown templates:
{
  "group": "experiments",
  "command": "createExperimentFromTemplate",
  "params": {
    "templateContent": "---\nname: my_experiment\ntype: test\npercentages: \"50/50\"\nunit_type: user_id\napplication: www\n---\n\n## Variants\n\n### variant_0\n\nname: control\nconfig: {}\n\n---\n\n### variant_1\n\nname: treatment\nconfig: {}\n"
  }
}
Templates use YAML frontmatter for configuration and markdown for variants, audience, and description. Names for applications, unit types, metrics, teams, tags, and owners are automatically resolved to IDs.
Read the absmartly://docs/templates resource for complete examples including:
- Basic A/B test
- Feature flags
- Group Sequential Tests (GST)
- Screenshots
- Custom fields
- Multi-variant (A/B/C) tests
Command Groups
Plus: goaltags, metrictags, metriccategories, apikeys, permissions, assetroles, notifications, favorites, cors, updateschedules, customsections, platformconfig, activity, statistics, events, storageconfigs, actiondialogfields.
Resources
Prompts
Embedding in a Node server (@absmartly/mcp package)
The package has separate entry points, so a Node host does not install or load the Cloudflare Worker stack:
import { APIClient } from "@absmartly/cli/api-client";
import { createStreamableHttpHandler, FetchHttpClient } from "@absmartly/mcp";

const mcp = createStreamableHttpHandler(async (req) => ({
  apiClient: new APIClient(new FetchHttpClient(endpoint, { authToken, authType: "jwt" })),
  endpoint,
  authType: "JWT",
}));
app.post("/mcp", (req, res, next) => mcp.post(req, res, req.body).catch(next));
FetchHttpClient supports authType "jwt", "api-key", and "service-key" (with impersonatedUserId). It rejects absolute URLs to other origins and does not let request headers override the credential.
Dependencies.
@absmartly/cliis a peer dependency (>=1.7.0 <2). The host's own copy is used, andNodeMcpRequestContext.apiClientis typed structurally (ApiClientLike), so anAPIClientfrom any version in that range type-checks without a cast.hono,@cloudflare/workers-oauth-providerandagentsare optional peers that only@absmartly/mcp/workerneeds.- The Node entries never import them.
honois still installed as a dependency of@modelcontextprotocol/sdk.
Migrating from 1.x. 2.0.0 is a major release because the dependency and export surface changed:
@absmartly/climoved fromdependenciestopeerDependencies, so the host must install it.- The Worker-only packages (
hono,@cloudflare/workers-oauth-provider,agents) are no longer installed with the package. mainandtypesnow point at the core entry.workers-mcpanddotenvwere removed.
Existing @absmartly/mcp, @absmartly/mcp/node-http and @absmartly/mcp/oauth imports keep working. They now also resolve under require.
Contract testing. endpoint-manifest.json is generated from the tool definitions and the @absmartly/cli build (npm run manifest). Its endpoints array lists { method, path } pairs, such as GET /v1/experiments/{id} and GET /auth/current-user. Parameter names are not significant. A host can assert that each pair exists in its OpenAPI spec. tools, resources and commands break the list down per tool, per resource and per execute_command command.
Development
Prerequisites
- Node.js 22.12.0+ (the CommonJS entries
require()the ESM-only@absmartly/cli, which needs unflaggedrequire(esm)) - Cloudflare account (for remote deployment)
- ABsmartly account and API key
Setup
git clone https://github.com/absmartly/mcp.git
cd mcp
npm install
Local Development
npx wrangler dev --port 8787    # Run Worker locally
npx @absmartly/mcp              # Run stdio server
Testing
npm run test:unit       # Unit tests
npm run typecheck       # TypeScript type checking
npm run smoke:worker    # Worker starts under wrangler dev and serves /health
npm run test:e2e        # Gated e2e suite: fresh Worker + test-1 API, no skips allowed
npm run verify:release  # Everything above; runs automatically on npm publish
npx tsx scripts/audit-catalog-params.ts   # Compare every catalog command's params with its CLI core function
tests/unit/cli-catalog-core-params.test.ts runs catalog commands through the real @absmartly/cli core over a fake HTTP client, and fails if the audit finds any catalog/core param mismatch.
test:e2e needs ABSMARTLY_API_KEY and ABSMARTLY_API_ENDPOINT (test-1)
and fails without them. See tests/README.md.
The e2e suites call the Worker through the official MCP SDK client, with no model in the loop. To run one against a Worker you started yourself:
MCP_WORKER_URL=http://127.0.0.1:8787 npx tsx tests/integration/sdk-tools.test.ts --profile test-1
CI/CD
GitHub Actions runs automatically:
- CI (every push/PR): typecheck, unit tests, Worker startup smoke test
- Deploy (push to main): tests, Worker smoke test, Cloudflare Workers deployment
- Publish to npm (push to main with a version bump): gated e2e job, then
npm publish(which runsverify:releaseagain)
Deployment
npm run deploy          # Deploy to Cloudflare Workers
npm run build:dxt       # Build DXT extension
Project Structure
src/
├── core.ts               # Node/core package entry (@absmartly/mcp)
├── worker.ts             # Worker package entry (@absmartly/mcp/worker)
├── index.ts              # Cloudflare Worker (OAuth, auth, resources, prompts)
├── node-http-server.ts   # Node Streamable HTTP handler
├── local-server.ts       # Standalone stdio server
├── cli-catalog.ts        # 230+ commands mapped to CLI core functions
├── tools.ts              # Shared MCP tool setup (4 tools)
├── fetch-adapter.ts      # HTTP client bridging APIClient to fetch
├── resources.ts          # MCP resources (docs + entity data)
├── absmartly-oauth-handler.ts  # OAuth flow handler
├── shared.ts             # Shared utilities
└── types.ts              # TypeScript types
Security
- No server-side secrets — credentials provided by the MCP client
- Session isolation — each connection has its own credentials
- OAuth protection — API key sessions block OAuth discovery to prevent auth method confusion
- Destructive action confirmation — start, stop, archive, and delete operations require explicit confirmation
- Requests stay under the API base —
FetchHttpClientonly sends requests under the configured base's/v1(plus the root/auth/current-userpaths), to the configured origin. It rejects dot segments (including%2e/%2Eand multiply-encoded forms), backslashes, encoded separators (%2f,%5c) and control characters before the URL is built, sofetchnever normalises a path like/v1/../authout of the prefix. Redirects are not followed. - API error surfacing — validation errors from the API are returned with full detail for correction
License
MIT License - see LICENSE file for details.