Google Developer Codelab: Automated UI Testing with Antigravity (Agy) CLI, BrowserMCP, Playwright, and the Browser Agent
About this Repo
- This repo: agentic-ui-testing
- Author: Darren "Dazbo" Lester
Power your agent
การติดตั้งจากผู้เผยแพร่ ไม่ใช่เอนด์พอยต์ของ PlugMCP
URL แบบรีโมตหรือคำสั่งบนเครื่องของคุณ? การติดตั้งสองแบบต่างกันอย่างไร
รันบน PlugMCP
A new server you create. It is not this listing's official endpoint. Use the publisher install when you want their URL and their credentials.
เปิดจากผู้เผยแพร่
Google Developer Codelab: Automated UI Testing with Gemini CLI and BrowserMCP, and Playwright
Everything below this point is included in the Codelab. The Codelab is split into sections, with each section mapping to a H1 (#) heading.
The agentic AI revolution is transforming how we build software, making the entire process feel incredibly cool, exciting, and accessible. Tasks and projects that would have previously taken developers months to complete can now be achieved in a single session using agentic tools.
One area ripe for this agentic transformation is web application testing. Traditionally, testing web apps has been a chore and a constant battle against fragility. But what if you could bypass that complexity entirely? What if you could simply tell an agent what to test in plain, natural language, and let the agent reason about how to execute it?
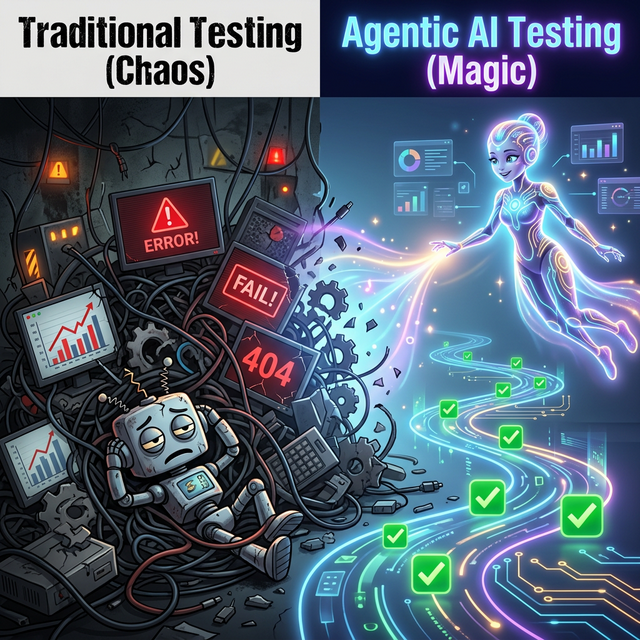
In this codelab, we'll explore how to use Antigravity CLI along with agent skills, and multimodal MCP tools like BrowserMCP. You'll see how to create and run automated UI tests using natural language, showing how agentic tools can handle complex tasks and give you superpowers as a builder.
Crucially, whilst this codelab focuses on the specific use cases of UI automation and browser remote control, it is the underlying principles and the massive world of possibilities they unlock that are truly important. By teaching agents to use local CLIs and MCP servers, we can delegate complex workflows that we wouldn't otherwise have the time or specialised expertise to handle ourselves.
This codelab makes use of the Antigravity CLI, MCP tools, agent skills, and a React demo application.
You will:
[!NOTE] This is the new Antigravity CLI version of the codelab. It replaces the older Gemini CLI version of the lab to align with Google's latest tooling.
In May 2026, Google dropped the new Antigravity suite. This was a major overhaul of Antigravity, and a split into these four products:
google.antigravity we can programmatically leverage Antigravity’s capabilities.Although this lab focuses on using Antigravity CLI, everything in this lab can also be done with Agy IDE or Agy 2.0.
Before we dive into the cool stuff, let's make sure you have everything you need.
This lab assumes that you already have:
To use Antigravity CLI, you’ll need to authenticate with Google. When you first launch agy, it will automatically prompt you for Google Sign-In via your default web browser. This option comes with a generous free quota of Gemini usage and does not require a Google Cloud project. If you have a Gemini API key or Google Cloud project, you are free to configure this as well.
The instructions assume you're working in a Linux (or WSL) or macOS environment. If you're on Windows (like me), you can follow along using WSL.
(Note that BrowserMCP will not work from Google Cloud Shell, because it will only connect to a local browser running on the same machine.)
I've created a demo repo on GitHub. It includes a sample application we can use for our UI testing. Go ahead and clone it by running this from your local terminal:
git clone https://github.com/derailed-dash/agentic-ui-testing
cd agentic-ui-testing
There's a Makefile to make it easy for you to setup the environment to launch the demo app. Let's run it to initialise our environment:
make install

# Or if you don't have make
npm install --prefix demo-app
The app we're testing today is The Dazbo Omni-Dash — a futuristic, dark-themed dashboard for managing security telemetry.
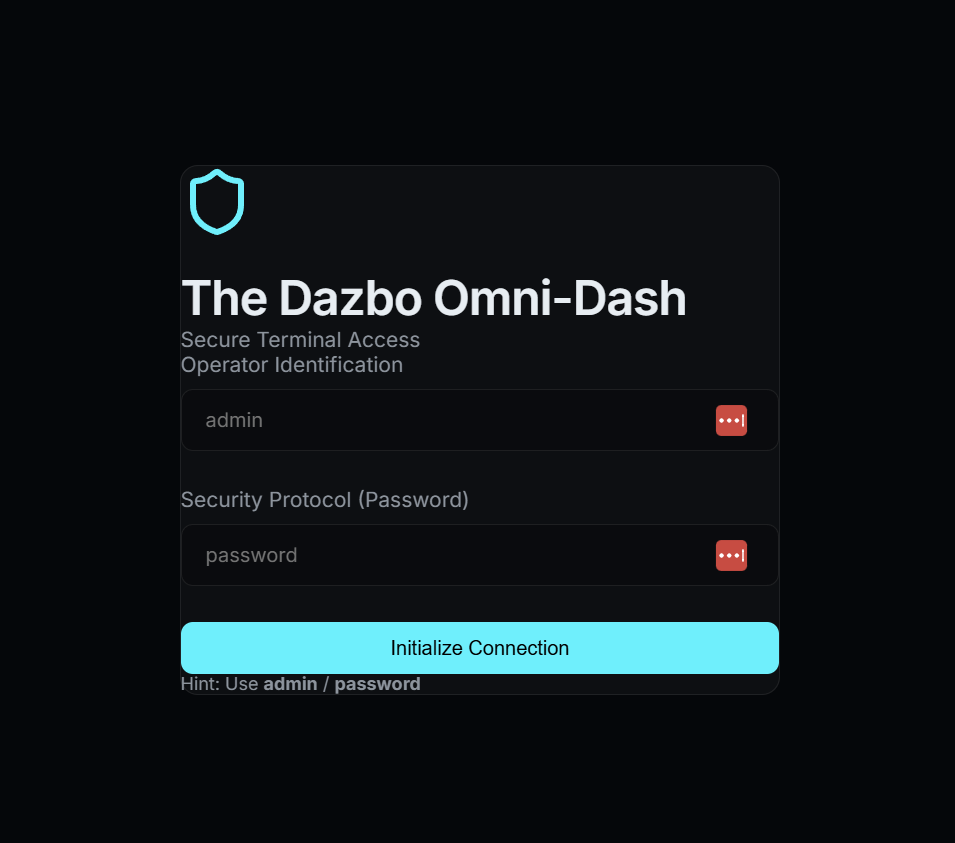
It’s built to provide a realistic testing surface with:
To start the application, simply run:
make dev

# Or if you don't have make
npm run dev --prefix demo-app
The development server should start very quickly, and the app will be available at http://localhost:5173.
We can just click on the link to open the application in our browser. Just leave this process running in your terminal. We'll perform subsequent terminal commands in a separate terminal session.
UI testing and automation have traditionally always been difficult things to get right and even harder to master. You do not need to be an expert in UI testing to appreciate this challenge.
Common pain points with traditional UI testing include:
div > div > button) or specific text labels. What happens if you rename a "log out" button to "log off"? Or move a button to a completely different menu? Or change the structure of your HTML? Traditional testing tools will break when you do those things, leading to constant script maintenance.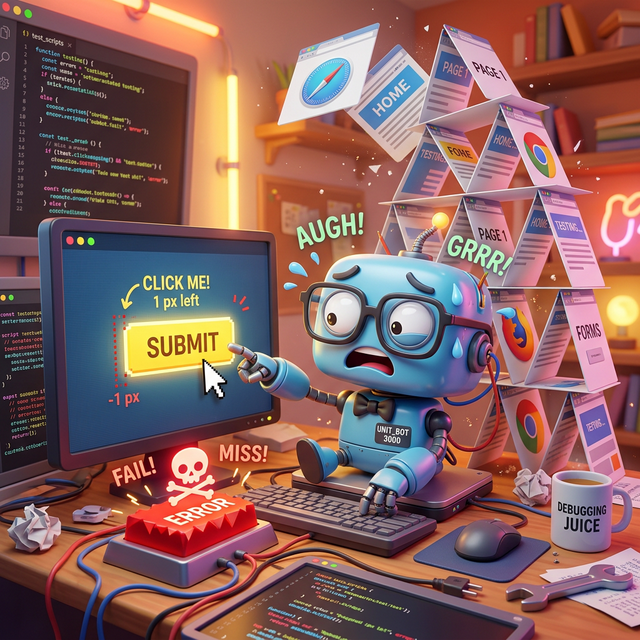
To solve these issues, we need a way to test that focuses on intent rather than implementation.
By leveraging agentic AI tools, we can create repeatable automation that is completely insulated from minor UI tweaks and structural changes. Instead of hard-coding names, labels, or the exact hierarchy of objects, the agent executes actions based on the user's natural language intent. If a button moves or its label changes slightly, the agent's multimodal capabilities allow it to locate the element and complete the task successfully.
The Model Context Protocol (MCP) is an open standard that allows AI models and agents to interact with external tools, APIs, and data. Think of it as the universal adapter that allows models and agents to find and execute the tools it has access to.
Traditionally, integrating Large Language Models (LLMs) with external data and tools required developers to write custom, hard-coded API connections for every new data source, creating an unsustainable "M x N" integration problem where every new model and tool multiplies the maintenance burden. The Model Context Protocol (MCP) solves this by removing the need to write specific code to orchestrate these capabilities. Instead of explicitly coding complex execution workflows, developers can rely on the LLM to interpret a user's natural language requests and dynamically reason about which tools to use on the fly.
When a user issues a natural language command (like "Navigate to localhost:5173, login as 'admin', and click the Submit button"), the LLM discovers the available capabilities and generates a structured request to invoke a specific tool. The MCP client acts as a translator, routing this request to the designated MCP server, which executes the action or fetches the data and returns the context to the model. This empowers the AI to act autonomously without the developer having to hard-code the specific execution path.
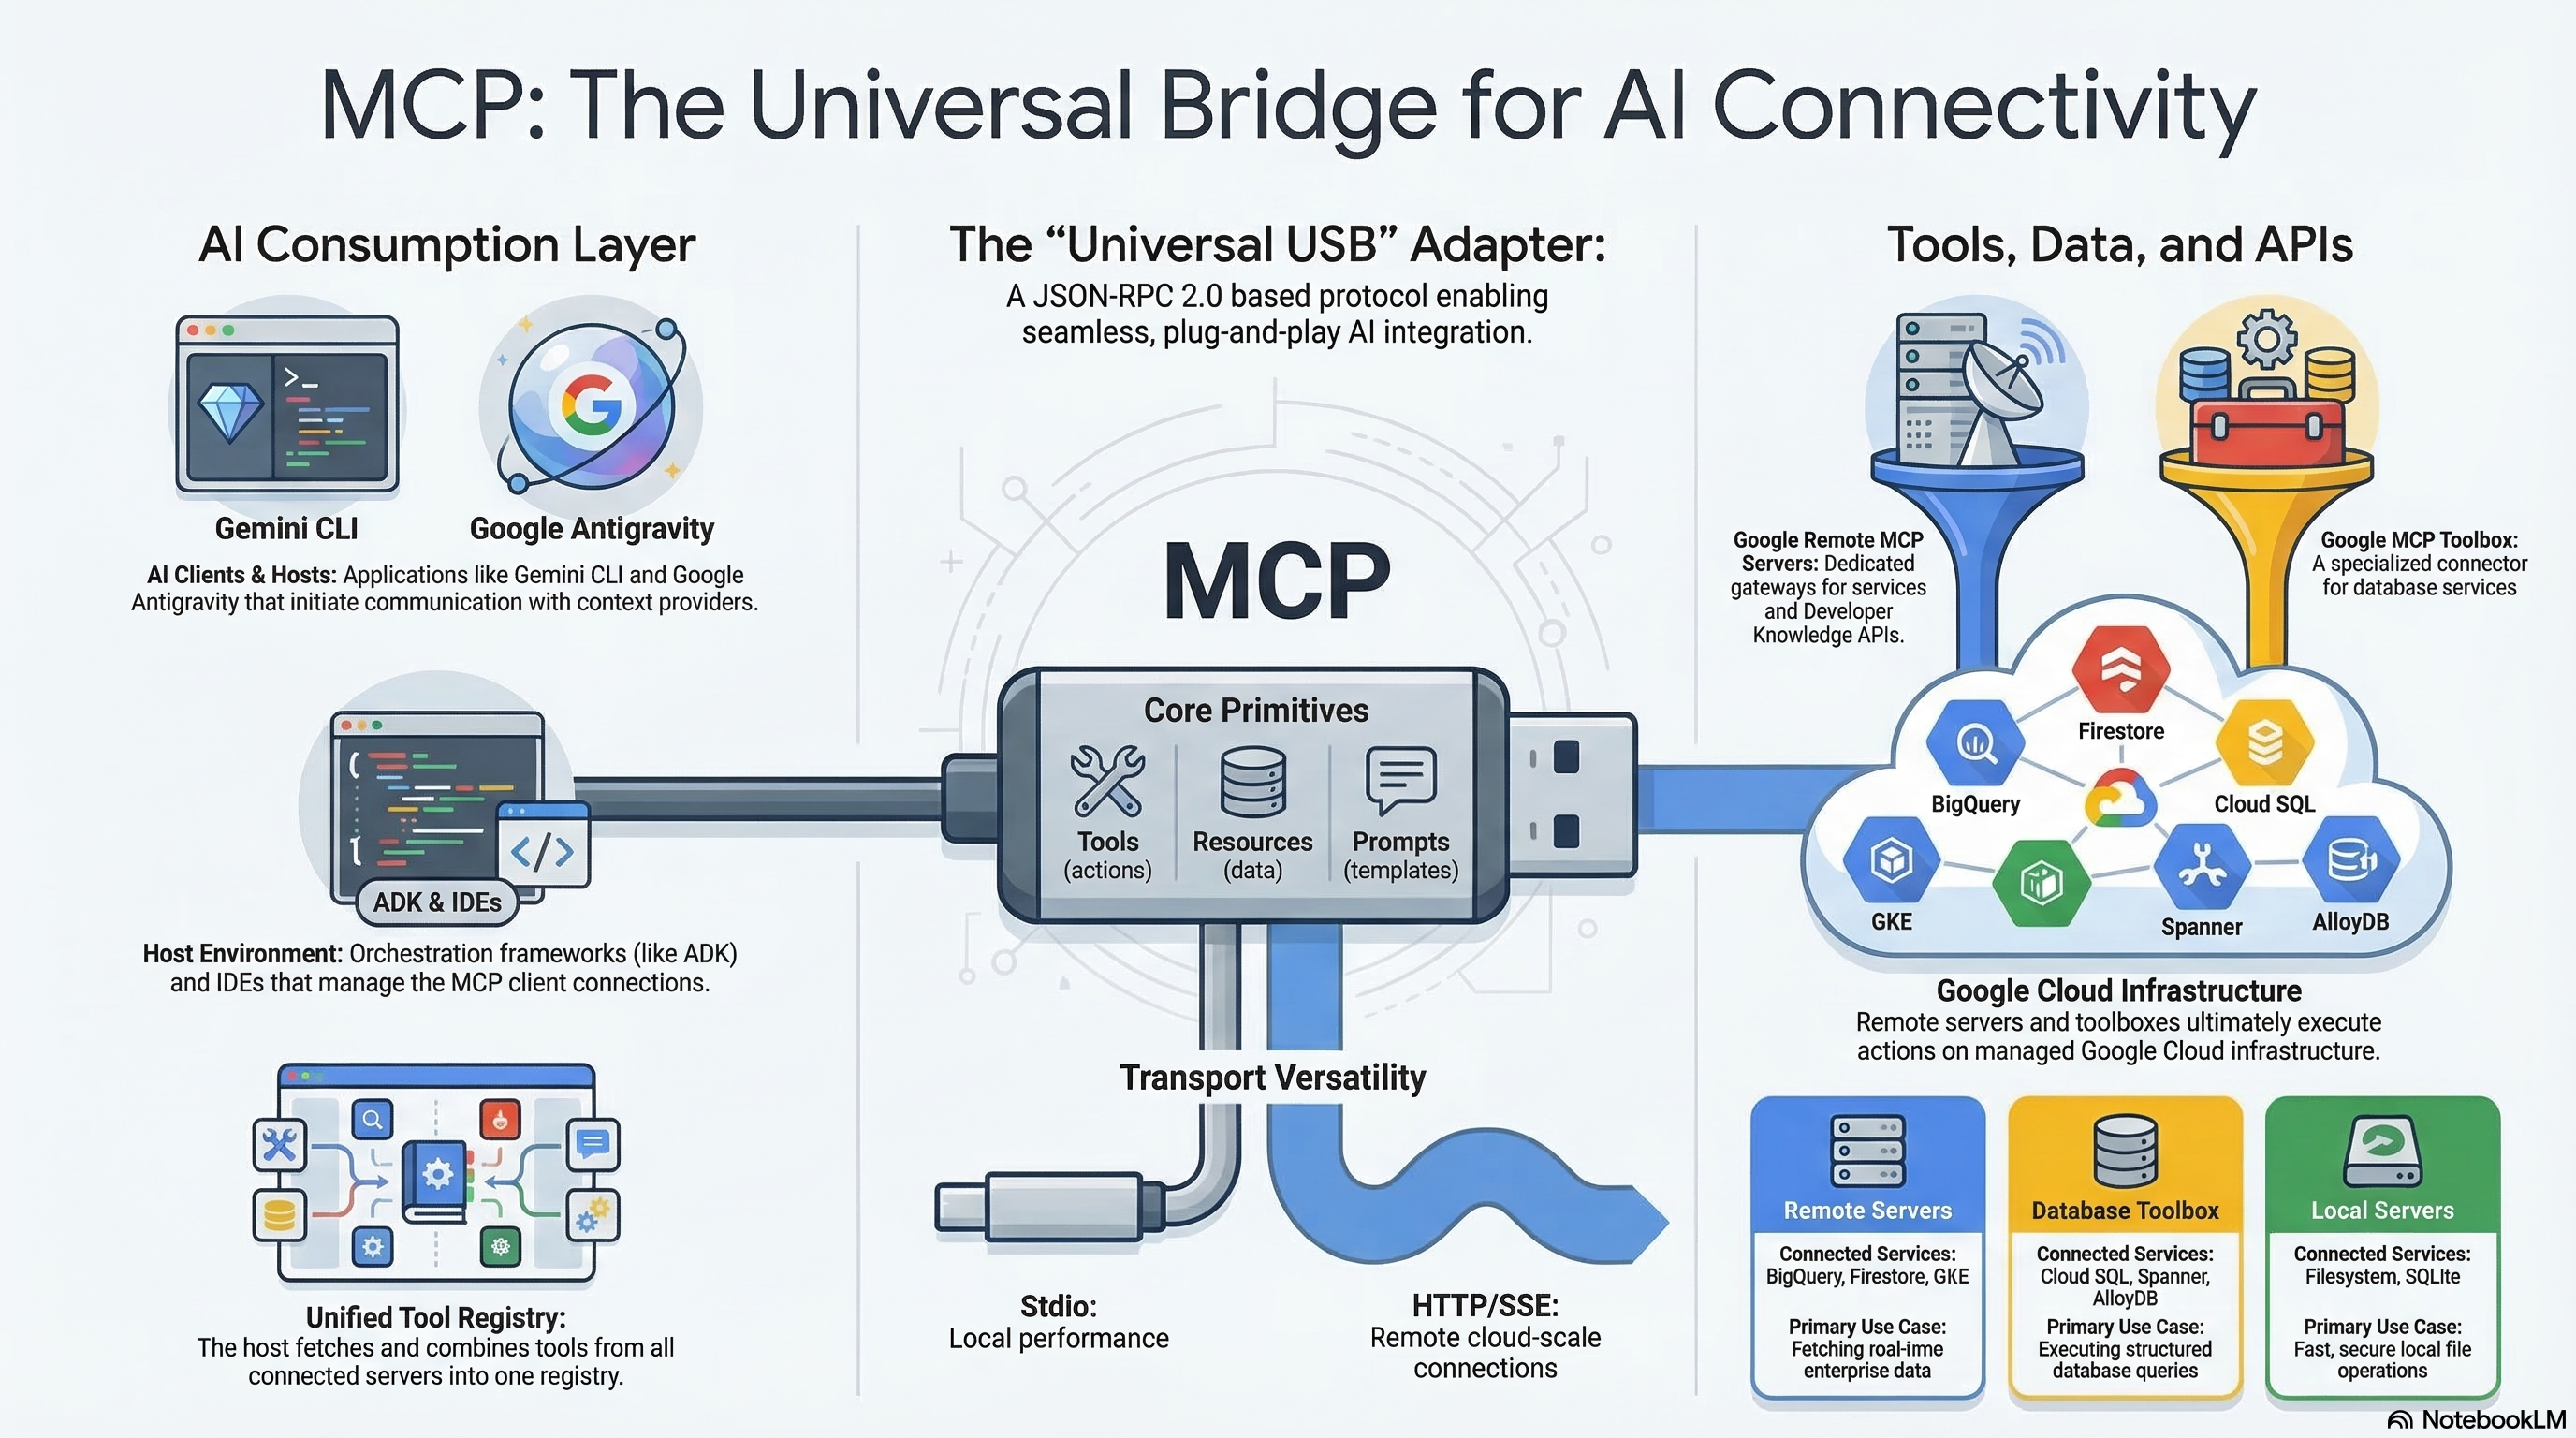
Because MCP creates a universal standard — often described as the "USB-C for AI applications" — it unlocks massive off-the-shelf reusability. Developers can build an MCP server once, and any MCP-compatible AI host can instantly connect to it, eliminating the M x N integration problem. You no longer have to build custom API bridges for every platform; instead, you can leverage the ecosystem of pre-built, open-source MCP servers for common services like GitHub, Slack, databases, whatever; plugging them straight into your agentic workflows. This modular, plug-and-play architecture ensures that if you switch LLM providers or upgrade your tools later, your core integration infrastructure remains completely unchanged.
This is the first tool we're going to play with today. BrowserMCP is an MCP server that gives AI agents "eyes" and "hands" it needs to interact with a web browser. In a nutshell, it mimics human interaction with a browser. It's open source and you can checkout the GitHub repo here. See the main BrowserMCP documentation here.
Here are some of its capabilities:
To use BrowserMCP, you need to do two things:
To install the extension, just follow the instructions here. This takes just a few seconds. Once it's installed, you click on "Connect" in the extension to allow your current tab to be controlled by your agent. (Obviously, you want the current tab to be the one where the demo application is running!)
Next, we configure the actual MCP server in Antigravity. We do this by adding the browsermcp server definition to our global mcp_config.json file.
Create or edit the file ~/.gemini/config/mcp_config.json and add the following configuration:
{
  "mcpServers": {
    "browsermcp": {
      "command": "npx",
      "args": [
        "-y",
        "@browsermcp/mcp@latest"
      ]
    }
  }
}
For a detailed walkthrough on setting up MCP servers and skills in the Antigravity ecosystem, see these resources:
Now for the magic. First, let's launch Antigravity CLI (by running agy) in a new terminal session. (Recall the demo application is running in our initial terminal session.) Inside the interactive TUI, type /mcp to verify the list of active tools and ensure browsermcp is available.
If you didn't start the demo application earlier, launch it now:
make dev
If you haven't already done so, you need to open the app in your Chrome browser, and connect the BrowserMCP extension in that tab. Follow the link from the run command. Then click the BrowserMCP extension icon and click on "Connect".
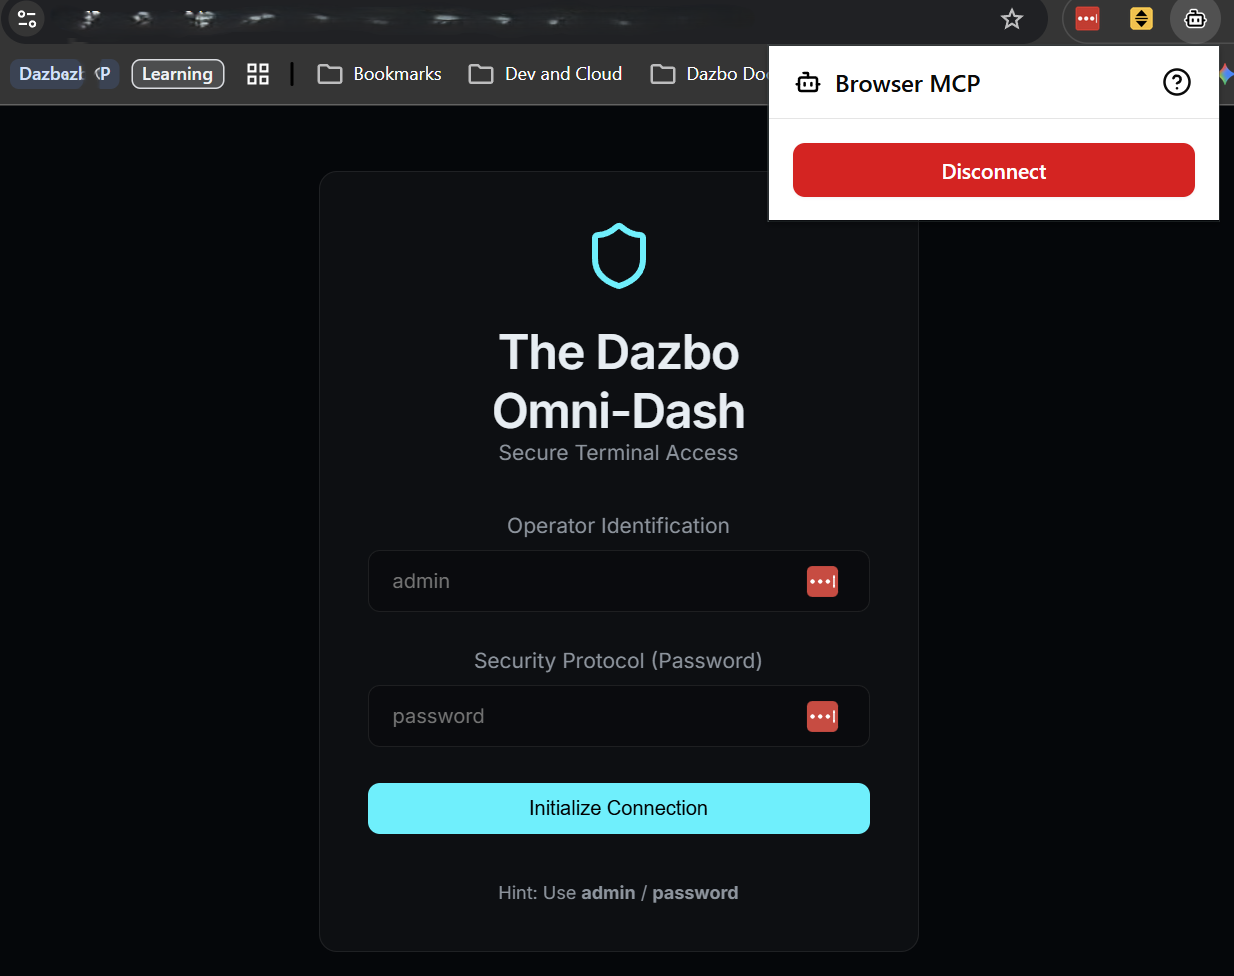
Now we can use the Agy CLI to run a test. Copy and paste this prompt into the CLI:
Using BrowserMCP, connect to the application at http://localhost:5173. If the application is not showing a login screen, first logout. Then login as 'admin' with password 'password', and verify that the dashboard title says 'System Overview'. In the main dashboard, read the telemetry values shown, and present them back to me in a markdown table.
The CLI might first check that the demo application is running on the specified port. Then it will prompt you to confirm the tool actions it plans to take. Allow the CLI to run all BrowserMCP tools for this session. Then go back to the browser, and watch the automated interactions take place!
A few things to note about the prompt above:
Cool, right?
We're done with BrowserMCP for now, so Disconnect it in your browser.
BrowserMCP is great, but it has a few limitations. For example:
Playwright is a much more sophisticated tool. It is a well-established, open-source browser automation and testing framework. It can do many things that BrowserMCP cannot, including all of the bullets I mentioned above.
It is much more suited to running complex, reliable, repeatable test scenarios. And it is particularly well-suited to working with long-running sessions, or indeed running multiple independent sessions in parallel.
But with such additional capability comes a much steeper learning curve.
Fortunately, we don't have to learn how to use Playwright directly. Instead, we can use an agent skill.

So, what exactly is an agent skill? Think of it as a tightly packaged bundle of domain expertise that you can hand to your AI agent when it needs to do something specific. It contains instructions, best practices, and sometimes even helper scripts tailored to a particular task.
Here's the really clever part: progressive disclosure. Instead of shoving every conceivable API doc and testing framework rule into the LLM's initial system prompt — which eats up your context window and burns through tokens like nobody's business — the agent only reads the skill when it actually needs it. It keeps the baseline context lean and mean, fetching the detailed "how-to" just-in-time. And yes, a skill can absolutely include instructions on how to leverage specific MCP servers to get the job done.
Think of it like that scene in The Matrix: The agent looks at a problem, realizes it needs to know Playwright, downloads the skill, and suddenly: "I know kung fu." Boom. Instant expert.
If you want to know more about skills, check out:
Using a skill here is a great choice. Playwright is incredibly powerful, but its syntax can be tricky. By giving the agent a Playwright skill, we don't have to worry about our LLM hallucinating outdated syntax or writing brittle selectors. We are giving it a curated, authoritative playbook on exactly how to use Playwright properly.
I'm going to make use of Playwright CLI and its associated skill.
With this approach we install Playwright CLI locally, and then give our agent the knowledge it needs to make use of it. For the avoidance of any confusion: I'm not installing any Playwright MCP server.
Let's first install the open source Microsoft Playwright CLI. If you are currently in an active agy session, exit the interactive CLI (by typing /quit or Ctrl+D). Then, in your terminal:
# Pre-req: nodejs installed
npm install -g @playwright/cli@latest # Install Playwright CLI globally
npm install @playwright/test # Install Playwright test framework

npx playwright install-deps # Install dependencies
npx playwright install chromium chrome # Install browser binaries in Linux / WSL
And now let's add the skill. This command will download the skill subfolder directly from GitHub into our shared Antigravity skills folder:
mkdir -p ~/.gemini/skills
npx degit microsoft/playwright-cli/skills/playwright-cli ~/.gemini/skills/playwright-cli
Now we can test it.
# Launch Playwright CLI with visible browser
playwright-cli open https://playwright.dev --headed
This should spawn a browser session, opened to the specified URL.
I also want our agent to be able to use Playwright in "headed" mode, i.e. with a visible UI. But the skill doesn't tell the agent how to do that. So I've added these lines to ~/.gemini/skills/playwright-cli/SKILL.md in the Core section:
# Add the following under the "playwright-cli open" command

# Run in headed mode so we can see the browser
playwright-cli open https://playwright.dev --headed
As before, we need to launch the application (if it's not already running). Do this from the initial terminal session:
make dev
Then, in the other terminal session, let's temporarily disable BrowserMCP so that the agent doesn't get confused about which tools to use. Relaunch the Antigravity CLI (agy). We can temporarily disable the browsermcp server directly via the TUI:
/mcp inside the prompt box to open the MCP management panel.browsermcp and press Enter/Return.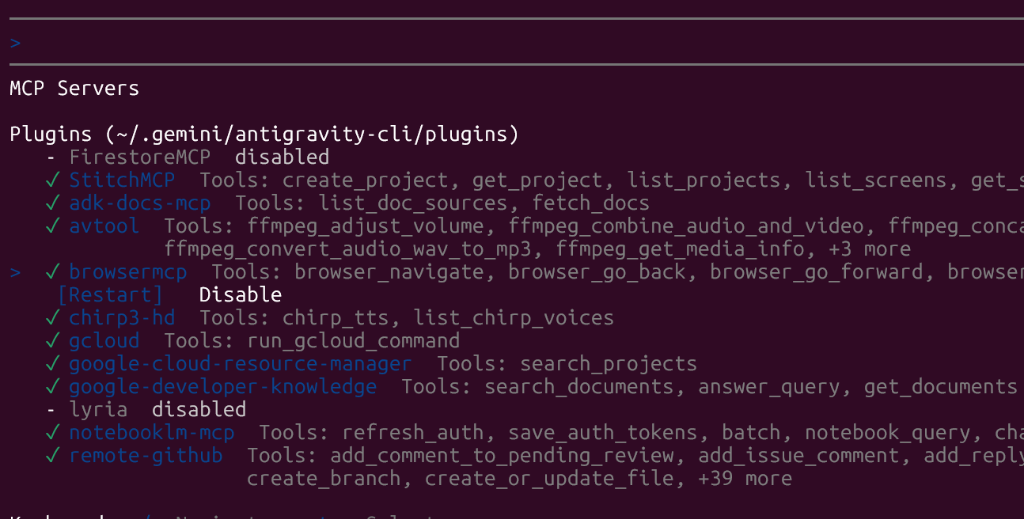
Now we'll ask the agent to navigate to our application with Playwright. But unlike with BrowserMCP, we don't need to fire up the browser first. Playwright will do that for us with a local process.
Enter this prompt into the Agy CLI:
Using Playwright, connect to the application at http://localhost:5173. Then login as 'admin' with password 'password', and verify that the dashboard title says 'System Overview'. Take a screenshot of the dashboard and save it to output/dashboard.png. In the main dashboard, read the telemetry values shown, and present them back to me in a markdown table.
(As always, the CLI will ask for permission before running any tools.)
What's different here?
Shortly after you should see a dashboard.png file in the output folder.
Note that you'll see the tool calls executing in the Agy CLI, but you won't see the browser UI. That's because Playwright runs in "headless mode" by default.
But if you re-run with this amended prompt, you'll be able to see the UI too:
Using Playwright, connect to the application at http://localhost:5173 in **headed** mode, and keep the browser open when you're done. Login as 'admin' with password 'password', and verify that the dashboard title says 'System Overview'. Take a screenshot of the dashboard and save it to output/dashboard.png. In the main dashboard, read the telemetry values shown and record them. Then wait 3 seconds, read them again. Now present the data back to me in a markdown table.
The Agy CLI output should look something like this:
How awesome was that?
Google Antigravity comes equipped with its own built-in browser agent (Browser Subagent) that provides browser automation out-of-the-box, without requiring you to install a separate tool like Playwright CLI.
To control your browser, the built-in browser agent works directly via the Chrome DevTools Protocol (CDP), removing the need for any browser extensions or intermediate plugins in Antigravity 2.0 and the IDE.
When launched, Antigravity connects to your Chrome instance via a local debugging port over a WebSocket connection. High-level instructions from the agent are translated directly into low-level CDP commands that:
By combining direct CDP control with visual, multimodal analysis, the subagent takes your high-level goal (e.g., "verify that the dashboard displays the correct telemetry values"), analyses the page visually to figure out what actions are required, and executes them itself. It also automatically records videos and takes screenshots of its actions, saving them directly into your workspace as Artifacts to serve as visual proof of test execution.
[!IMPORTANT] The built-in browser agent is not yet supported in the terminal-first Antigravity CLI (Agy CLI). However, you can use it out-of-the-box in Antigravity IDE and Antigravity 2.0 today. Hopefully, support for the browser agent will be coming to Agy CLI in a future release!
A note for WSL users: Getting the Browser Agent to work in Antigravity under WSL is now much easier than it used to be. Rather than dealing with complex network routing and port forwarding, you simply need to enable "mirrored" network mode in your WSL configuration. For a complete step-by-step walkthrough, see the guide Resolving WSL Friction with Google Antigravity: The Agy 2.0 and Agy IDE Edition.
Browser automation isn't just about making sure your login button works before a Friday afternoon deployment. Once you realise you can wire an LLM directly to a browser, a whole new world of home-grown, agentic projects opens up.
If you're building your own AI agents, here are a few ways you might use tools like BrowserMCP or Playwright CLI to do the heavy lifting:
Congratulations! You've just built and executed automated, robust UI tests simply by telling an AI agent what you wanted it to do in plain English. No fragile CSS selectors, no complex setup scripts.
You've learned:
Now, go forth and automate the boring stuff!
If you want to dig deeper into the tools and concepts we covered today, check out these resources:
Repo Code
Core Tools & Frameworks
Agentic Concepts & Skills
Troubleshooting & Setup
About the Author
Google Developer Codelab: Automated UI Testing with Gemini CLI and BrowserMCP, and Playwright
เครื่องมือ
ยังไม่มีรายการเครื่องมือ เซิร์ฟเวอร์แบบรีโมตจะได้รายการหลังการตรวจสอบสถานะครั้งแรก
FAQ
คัดลอกคอนฟิก stdio สำหรับ Cursor, Claude Desktop, Claude Code หรือ VS Code ได้ในหน้านี้ คอนฟิกนี้ใช้การติดตั้งของผู้เผยแพร่ ไม่ใช่พร็อกซีของ PlugMCP
ระเบียนนี้ไม่ได้ระบุตัวแปรสภาพแวดล้อมที่จำเป็น
Agentic Ui Testing ทำงานแบบโลคัลผ่าน stdio
ตรวจสอบล่าสุดเมื่อ 2026-10-28 Google Developer Codelab: Automated UI Testing with Gemini CLI and BrowserMCP, and Playwright