Build on a machine you choose. Run workloads on connected workers. Keep control of where your applications and data live.
Power your agent
การติดตั้งจากผู้เผยแพร่ ไม่ใช่เอนด์พอยต์ของ PlugMCP
URL แบบรีโมตหรือคำสั่งบนเครื่องของคุณ? การติดตั้งสองแบบต่างกันอย่างไร
รันบน PlugMCP
A new server you create. It is not this listing's official endpoint. Use the publisher install when you want their URL and their credentials.
เปิดจากผู้เผยแพร่
Build on a machine you choose. Run workloads on connected workers. Keep control of where your applications and data live.
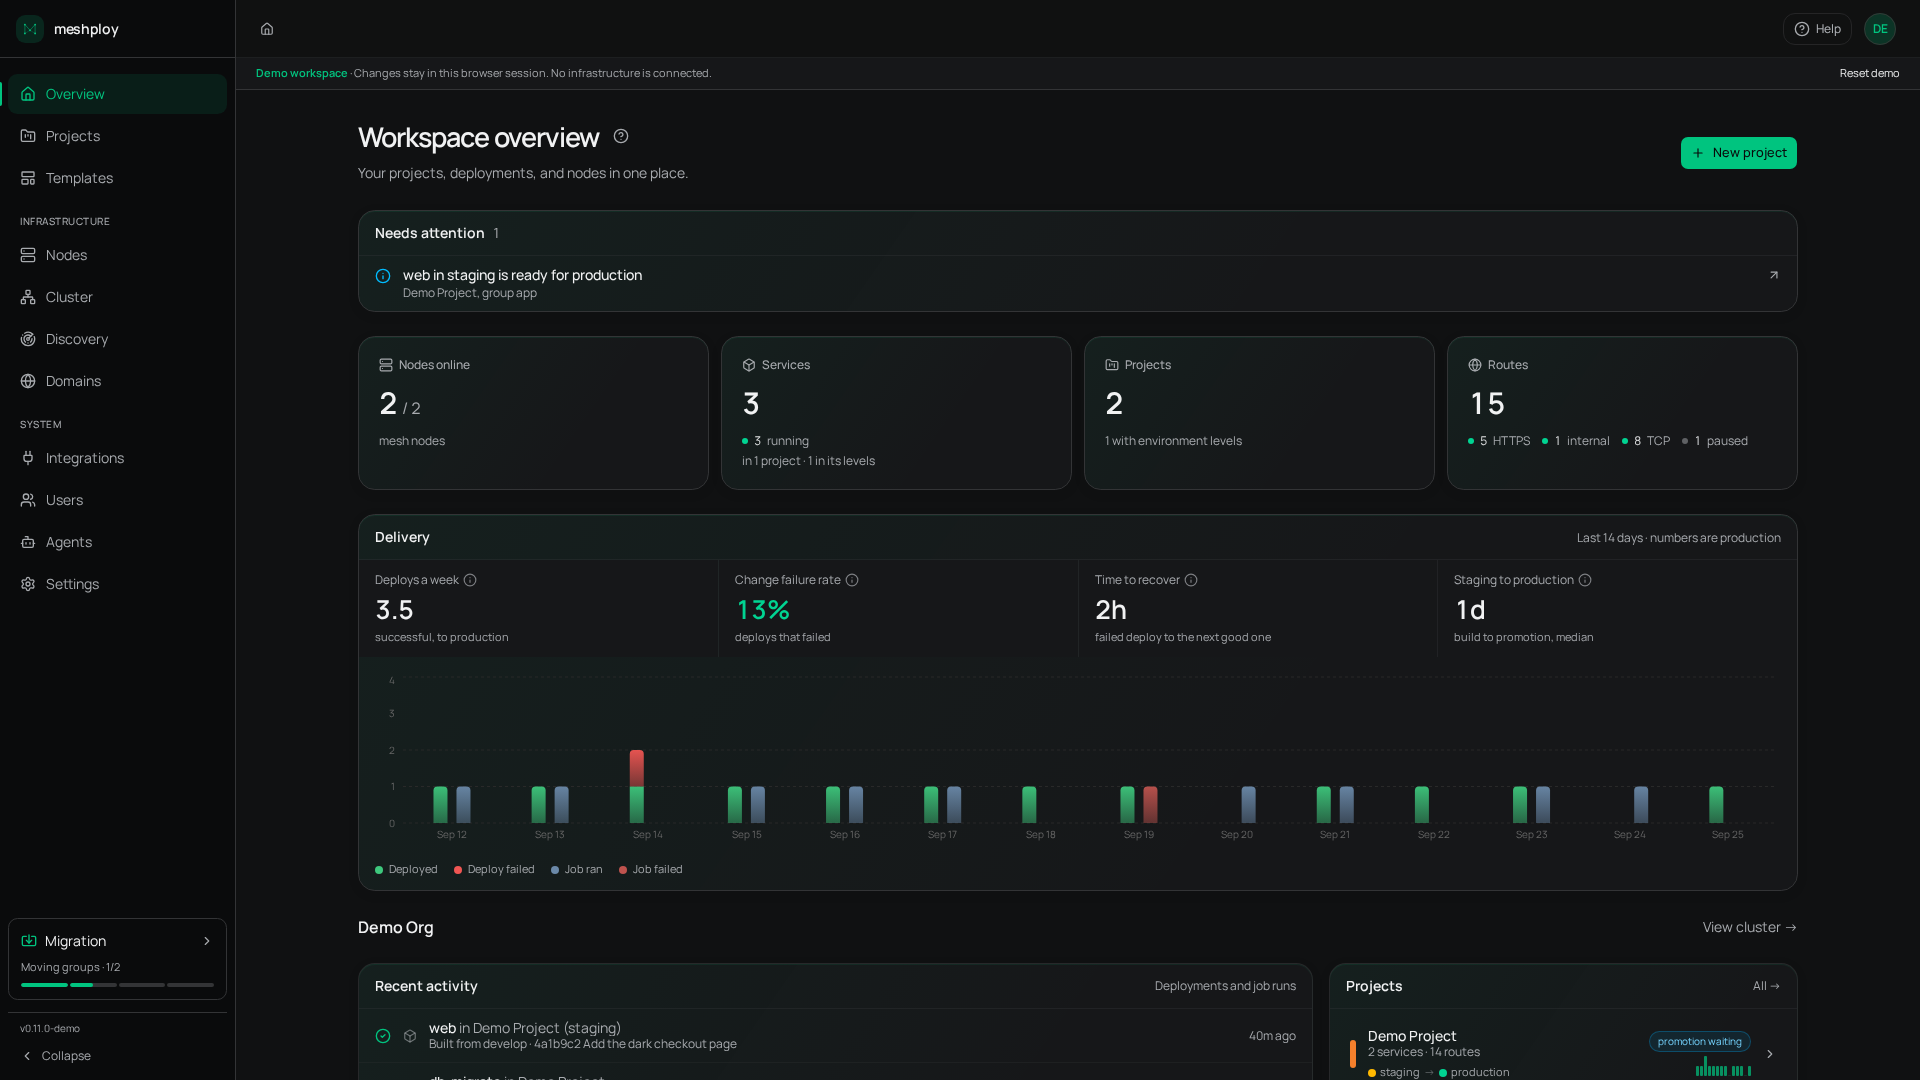
Self-hosted PaaS, like Heroku or Vercel on your own servers. Push your code, get a live app. Use one machine or many, even a laptop, all working as one cloud that stays yours.
Meshploy uses K3s for workloads and WireGuard for communication between connected machines. You remain responsible for the hosts, their firewalls, availability, and data recovery. See how it works for the architecture and the backup guide for engine-specific recovery support.
Want to explore first? Open the playground to try the console with sample data.
Meshploy has an MCP server with about 100 tools, so an agent can do what the console does: deploy an app from a folder, a Compose file or a one-click template, give it an address, read its logs and deployments, set its variables and secrets, take backups and roll back. Secrets are write-only: no tool reads them back, so a password an agent sets never returns through a transcript.
Connect it in one of three ways:
Signing in, from any machine. In Claude, open Settings, then Connectors, and add a custom connector with your gateway's https://console.<your-domain>/mcp; Cursor and VS Code take the same address as a remote server. The client sends you to the console to approve it, and then works with your access (or, if you are an owner or admin, as an agent you choose). The console's Connectors page shows the address, each client's one step to add it, and what is connected.
Locally, acting as you. Install the CLI (released for Linux; on macOS or Windows, build it from source or use the remote endpoint below), sign in with meshploy auth login, and add the server to your client. For Claude Code, in the project's .mcp.json:
{
  "mcpServers": {
    "meshploy": { "command": "meshploy", "args": ["mcp"] }
  }
}
With a key, as its own identity. For CI, scripts and clients that take a pasted token: create a key under Connectors in the console, grant it the projects it may touch, and point your client at your gateway's https://console.<your-domain>/mcp with the agent's key. The console shows the configuration for each client.
Meshploy is self-hosted, so the agent talks to your own gateway: install one first. See Connect an agent for identities and permissions, and the CLI reference for the tools.
Read the contributing guide for development setup and the roadmap for work in progress and future directions. Report bugs through GitHub Issues; report vulnerabilities using the security policy.
For implementation details, see design decisions, database models, proxy internals, and the repository rules.
meshploy/
├── apps/
│   ├── api/          # API entrypoint: main.go calls server.Main() from packages/server
│   ├── proxy/        # Edge proxy: "Ask & Resolve" L7 routing over the WireGuard mesh
│   ├── cli/          # meshploy CLI: static binary for nodes, the cluster and the platform
│   ├── web/          # Dashboard: Vite + React 19 + TanStack Router
│   ├── builder/      # Builder image: git clone + Railpack / Dockerfile builds
│   └── docs/         # Documentation site (Astro Starlight), generated from these READMEs
├── packages/
│   ├── server/       # API core: config, handlers, services, middleware, k8s
│   ├── db/           # Shared GORM models: all 41 tables, migrations, encryption
│   ├── client/       # Typed Go client for the API, used by the CLI and the MCP server
│   ├── mcpserver/    # MCP tool definitions: stdio through the CLI, remote at /mcp
│   ├── proxy/        # The edge proxy's code (apps/proxy is its one-call main)
│   └── license/      # Enterprise licence verification
├── deploy/
│   ├── install.sh           # The installer
│   ├── docker-compose.yml   # Production: pulls images from GHCR
│   ├── caddy/               # Custom Caddy build + a Caddyfile for each DNS mode
│   ├── headscale/           # Headscale config
│   └── coredns/             # CoreDNS zones + Corefile
├── get.sh                   # Bootstrap served at meshploy.com/install.sh; fetches deploy/
├── go.work                  # Go workspace: links all Go modules
└── .env.example             # Environment variables for local development
Requirements: systemd, x86_64 or arm64, kernel ≥ 5.4. Alpine and non-systemd distros are not supported.
systemd-resolved on Ubuntu 22.04+; the installer will warn you. UDP 41641 is optional: it lets nodes reach the gateway directly instead of through a relayTwo ways to do the same install. Run it yourself, or hand it to an agent - the agent runs the same script and stops at the same questions.
sudo bash -c "$(curl -fsSL https://meshploy.com/install.sh)"
The script installs Docker (if needed), downloads Meshploy to /opt/meshploy, walks you through an interactive setup (domain, IP, secrets), and starts the full stack. Select Master for the gateway node or Worker to join an existing mesh.
Before the first question, the installer offers to continue in a browser instead. Say yes and it prints a setup token and an address on port 9000, where the same setup runs as a web page that checks your DNS as you go and streams the install. Port 9000 has to be reachable from wherever your browser is.
If you work through Claude Code, Codex or a similar agent with a terminal, give it the prompt below instead of running the command yourself. It carries no secret, so it is safe to copy anywhere.
The agent stops where the decisions are yours: it will not choose your domain, and it does not need your DNS provider's password.
# Install Meshploy on my server

Set up a Meshploy gateway on a Linux server I own, and leave me at the setup
page with the install running.

## Work out how to reach the machine

Look before you ask. Read my SSH config for hosts I have already set up:

```
grep -iE '^host ' ~/.ssh/config 2>/dev/null
```

Then ask me one question, not four:

- If that listed candidates, show them and ask which one this is - or whether
  it is a machine not in there.
- If it listed nothing, or I say it is a new machine, ask for the address. The
  user is **root** unless I say otherwise; only ask about the port and key if
  the defaults do not work.

Confirm it works **without anything being typed**, and stop if it does not:

```
ssh -o BatchMode=yes -o ConnectTimeout=8 <host> 'hostname; id -u'
```

`BatchMode=yes` is not optional. Without it, a server that wants a password
leaves this command waiting for input you cannot give, and it looks to me like
you are still working.

If it fails, do **not** ask me for a password, and do **not** use `sshpass`:

- **SSH wants a password.** I run `ssh-copy-id <host>` once, and you carry on.
- **It cannot connect at all.** Give me the error; the address or the port is
  probably wrong.

If it answered but `id -u` was not `0`, you are not root. Check whether that
account can become root without typing anything:

```
ssh -o BatchMode=yes <host> 'sudo -n true' && echo "sudo ok"
```

If that fails, stop and tell me - I will either give you a root login or run
the install myself and tell you when the setup page is up.

Use whatever I gave you as `<host>` from here on - an alias from my config if
that is what it was, and `user@address` if not.

## Check the machine is one we can use

```
ssh <host> 'cat /etc/os-release | head -2; systemctl --version | head -1; df -h / | tail -1; ls /opt/meshploy 2>/dev/null'
```

- Ubuntu 20.04+, Debian 11+, Fedora 38+, RHEL/Rocky/Alma 8+, CentOS Stream 9+,
  openSUSE, or Arch. **Alpine and anything without systemd will not work** -
  stop and tell me.
- At least 5 GB free on `/`.
- If `/opt/meshploy` already exists, this server already has Meshploy. Stop and
  ask me whether I want to reinstall or upgrade instead.

Also check nothing already holds the ports Meshploy needs:

```
ssh <host> 'ss -Hltnp "sport = :80" ; ss -Hltnp "sport = :443" ; ss -Hltnp "sport = :53"'
```

If something does, tell me what it is and stop. Do not stop or remove it.

## Get my approval

Show me this and wait for a yes:

```
Server:   <host>
Installs: Docker (if missing), k3s, Headscale, CoreDNS, Caddy, Meshploy
Opens:    80, 443, and 53 unless I choose self-managed DNS
Needs:    root (sudo), a domain I control, and about 10 minutes
```

Ask me which domain I will use, and tell me I will need to add DNS records for
it partway through. Do not pick a domain for me.

## Run it

```
ssh -t <host> 'bash -c "$(curl -fsSL https://meshploy.com/install.sh)"'
```

As root that is all it needs. On a non-root login that could become root above,
put `sudo` in front of `bash`.

When it offers to continue in a browser, say **yes**. It prints a setup token
and an address on port 9000.

## Open the setup page for me

Port 9000 is usually closed to the internet, so tunnel it rather than asking me
to open a firewall:

```
ssh -N -L 9000:127.0.0.1:9000 <host>
```

Leave that running, open `http://localhost:9000` in my browser, and give me the
setup token. Then stop and let me take over: the domain, the DNS records and
the owner account are mine to enter.

## If it fails

- Port 53 is taken on Ubuntu: that is `systemd-resolved`. Tell me, and mention
  that `--dns-mode=ondemand` avoids needing port 53 at all. Do not disable it
  yourself.
- Unsupported distro, too little disk, or Meshploy already installed: stop and
  tell me. Do not work around it.
- Anything else: show me the output and stop. Do not re-run the installer.

## Rules

- Do not choose or register a domain for me.
- Do not change firewall rules, DNS records, or anything else on the server.
- Do not read or print my environment files.

Docs: https://docs.meshploy.com/self-hosting/
Adding a worker later needs no prompt of this size: the console's Mesh → Add a node gives you a one-line command carrying a single-use token, and a matching prompt beside it.
Pick a domain for Meshploy, ideally a dedicated subdomain such as meshploy.example.com. The console, the API and every app you deploy get hostnames under it. There are two ways to point it at the server; the installer asks which one when it cannot see a delegation already in place.
NS delegation (default). The gateway runs its own authoritative DNS (CoreDNS) for the domain, which lets it obtain one wildcard certificate. Add two records where the parent zone is hosted (for meshploy.example.com, that is example.com), the A record first:
ns1.meshploy.example.com   A    <gateway-public-ip>
meshploy.example.com       NS   ns1.meshploy.example.com
An NS record names a nameserver rather than an address, which is why the ns1 A record has to exist for the delegation to resolve. Verify once it has propagated:
dig @<gateway-public-ip> console.meshploy.example.com A
Self-managed DNS (--dns-mode=ondemand). For providers that cannot delegate a subdomain (Hostinger, for example). Keep DNS with your provider and add two A records; Caddy then issues a certificate per hostname the first time each one is requested:
*.meshploy.example.com   A   <gateway-public-ip>
meshploy.example.com     A   <gateway-public-ip>
Some providers call the second one the root or @ record. Verify:
dig +short console.meshploy.example.com A
Re-running the installer keeps whichever mode the server was installed with.
When the install finishes, open https://console.<your-domain> and register. The first account owns the instance, so the form asks for the one-time setup token the installer printed. If you no longer have it, print it again on the gateway:
sudo meshploy setup-token show
The token is only accepted until that first account exists. If someone else may have seen it before then, issue a new one with sudo meshploy setup-token rotate and restart the API (cd /opt/meshploy && docker compose up -d api).
Installing, reinstalling and removing all go through the install script:
Replace
URLwithhttps://meshploy.com/install.sh
Release channel: by default the installer tracks the latest stable release:
:latestimages and thedeploy/config from the newest release tag. Pass--edgeto trackmaininstead, which pulls:mainimages and branch config. Edge carries work that has not been released yet, so prefer stable unless you need something that has just landed. The choice is not remembered: a later re-run orsudo meshploy server-upgradewithout--edgewritesMESHPLOY_CHANNEL=latestand moves the install back to stable, so pass--edgeevery time if you mean to stay on it. Upgrades from the console keep the channel the server is on. To change it there, the server's owner uses Settings → Server, which shows both channels and where the server sits on them. The console only switches forward: edge to stable becomes available once a release includes the build the server runs, so it never installs older code.
TLS cert cache: Caddy stores Let's Encrypt certificates in a Docker volume.
--reinstallalways preserves this volume to avoid hitting rate limits (5 certs per domain per week). Use--wipe-dataonly when you genuinely need a clean slate.
Upgrading:
sudo meshploy server-upgradeon the gateway downloads the configuration and images for the latest release, then installs them and restarts the services, keeping your data. If the services do not come back, it puts the previous version back. The server's owner can also upgrade from the console: Update available in the sidebar opens an Upgrade now button. New installs are set up for that; on an older server, runsudo meshploy updater startonce after upgrading. Add--edgeto upgrade tomain. Runsudo meshploy updatefirst, so the upgrade runs with the latest CLI. See the CLI reference.
Community is complete and stays free: everything above is Apache-2.0, with one organization per server. Enterprise adds organizational features under a licence (the console's Settings → Licence → Compare editions lists them) and runs as separate private images, ghcr.io/meshploy/api-ee, web-ee and proxy-ee, built from the same source and version as each Community release.
Moving a server to Enterprise keeps its data and settings:
meshploy license activate <token>. It is verified and stored, and grants nothing until the switch, since Community has no Enterprise features built in.echo <token> | sudo docker login ghcr.io -u <github-user> --password-stdin (or podman). Credentials never pass through the console.sudo meshploy server-upgrade --ee on the gateway. Either points the API and the console at the Enterprise images and restarts them; if the images cannot be pulled, nothing changes.Upgrades then work as before, on either channel. The Enterprise images for a release appear a few minutes after it, and an upgrade started before they do stops without changing anything. meshploy license status shows the edition and the licence.
To go back to Community, remove MESHPLOY_API_IMAGE and MESHPLOY_WEB_IMAGE from /opt/meshploy/.env and run sudo meshploy server-upgrade. The licence and any Enterprise data stay in the database, unused.
git clone https://github.com/meshploy/meshploy
cd meshploy
cp .env.example .env
Edit .env:
DATABASE_URL=postgres://user:password@localhost:5432/meshploy?sslmode=disable
JWT_SECRET=your-long-random-secret
ENCRYPTION_KEY=0123456789abcdef0123456789abcdef   # exactly 32 characters: openssl rand -hex 16
docker compose -f deploy/docker-compose.dev.yml up -d
This starts only PostgreSQL on port 5432. Headscale, CoreDNS, Caddy, and the registry are not needed for local development — the API and frontend work without them.
cd apps/api && go run main.go
API at http://localhost:4000. The OpenAPI spec is at /openapi.json; it needs a bearer token, like every non-public route.
cd apps/proxy && go run main.go
cd apps/web && npm install && npm run dev
Dashboard at http://localhost:5173
Meshploy exposes an OpenAPI 3.1 REST API. The spec is served at /openapi.json and Huma's docs page at /docs, both behind the same bearer-token authentication as the API.
See apps/api/README.md for the full route reference.
git checkout -b feat/my-featureCLAUDE.mdApache-2.0. The name and logo are covered separately by the trademark policy.
Each artifact ships the licences of what it bundles: images carry them at
/usr/share/meshploy, the CLI release has one beside its binaries, and the
console serves its own at /third-party-notices.md. They are generated from
the built artifacts by scripts/gen-notices.py, which CI keeps current.
Inspired by Northflank, Tailscale, and Dokploy.
This project was built with AI assistance. Architecture decisions, code generation, and debugging were done with the help of Claude Code and Gemini. Every generated output was reviewed, tested, and adapted by the author.
Self-hosted PaaS, like Heroku or Vercel on your own servers. Push your code, get a live app. Use one machine or many, even a laptop, all working as one cloud that stays yours.
เครื่องมือ
ยังไม่มีรายการเครื่องมือ เซิร์ฟเวอร์แบบรีโมตจะได้รายการหลังการตรวจสอบสถานะครั้งแรก
FAQ
คัดลอกคอนฟิก stdio สำหรับ Cursor, Claude Desktop, Claude Code หรือ VS Code ได้ในหน้านี้ คอนฟิกนี้ใช้การติดตั้งของผู้เผยแพร่ ไม่ใช่พร็อกซีของ PlugMCP
ระเบียนนี้ไม่ได้ระบุตัวแปรสภาพแวดล้อมที่จำเป็น
Meshploy ทำงานแบบโลคัลผ่าน stdio
ตรวจสอบล่าสุดเมื่อ 2026-11-13 Self-hosted PaaS, like Heroku or Vercel on your own servers. Push your code, get a live app. Use one machine or many, even a laptop, all working as one cloud that stays yours.