
Selenium MCP Server
This is a server implementation that bridges the gap between MCP clients (AI assistants) and Selenium WebDriver. It exposes Selenium WebDriver's functionalities as MCP tools, allowing AI models to utilize them for tasks like:
- Browser management (launching, navigating, closing browsers)
- Element interaction (clicking, typing, finding elements)
- Web scraping and automated testing
- Advanced operations like screenshots, cookie management, and JavaScript execution
In essence, the selenium webdriver mcp setup allows AI assistants to leverage the power of Selenium Webdriver for web automation, by communicating with a dedicated Selenium MCP server via the Model Context Protocol. This facilitates tasks such as automated web interactions, testing, and data extraction, all controlled by AI.
🚀 Overview
A Model Context Protocol (MCP) server for Selenium that provides comprehensive Selenium WebDriver automation tools for AI assistants and applications. This server enables automated web browser interactions, testing, and scraping through a standardized interface.
Built with TypeScript and modern ES modules, it offers type-safe browser automation capabilities through the Model Context Protocol.
✨ Key Features
- Multi-Browser Support: Chrome, Firefox, Safari, and Edge browser automation
- Comprehensive Element Interaction: Click, type, hover, drag & drop, file uploads
- Advanced Navigation: Forward, backward, refresh, window management
- Wait Strategies: Intelligent waiting for elements and page states
- Type Safety: Full TypeScript implementation with Zod validation
🤝 Integration
MCP Client Integration
Configure your MCP client to connect to the Selenium server:
Standard Configuration (applicable to Windsurf, Warp, Gemini CLI etc)
{
  "servers": {
    "selenium-mcp": {
      "command": "npx",
      "args": ["-y", "selenium-webdriver-mcp@latest"]
    }
  }
}
Installation in VS Code
Update your mcp.json in VS Code with below configuration
NOTE: If you're new to MCP servers, follow this link Use MCP servers in VS Code
Example 'stdio' type connection
{
  "servers": {
    "selenium-mcp": {
      "command": "npx",
      "args": [
        "-y",
        "selenium-webdriver-mcp@latest"
      ],
      "type": "stdio"
    }
  },
  "inputs": []
}
Example 'http' type connection
{
  "servers": {
    "Selenium": {
      "url": "https://smithery.ai/server/@pshivapr/selenium-mcp",
      "type": "http"
    }
  },
  "inputs": []
}
After installation, the Selenium MCP server will be available for use with your GitHub Copilot agent in VS Code.
To install the Selenium MCP server using the VS Code CLI
# For VS Code
code --add-mcp '{\"name\":\"selenium-mcp\",\"command\": \"npx\",\"args\": [\"selenium-webdriver-mcp@latest\"]}'
# For VS Code Insiders
vscode-insiders --add-mcp '{\"name\":\"selenium-mcp\",\"command\": \"npx\",\"args\": [\"selenium-webdriver-mcp@latest\"]}'
To install the package using either npm, or Smithery
Using npm:
npm install -g selenium-webdriver-mcp@latest
Using Smithery
To install Selenium MCP for Claude Desktop automatically via
npx @smithery/cli install @pshivapr/selenium-mcp --client claude
Claude Desktop Integration
Add to your Claude Desktop configuration:
{
  "mcpServers": {
    "selenium-mcp": {
      "command": "npx",
      "args": ["-y", "selenium-webdriver-mcp@latest"]
    }
  }
}
Screenshot
Prompts
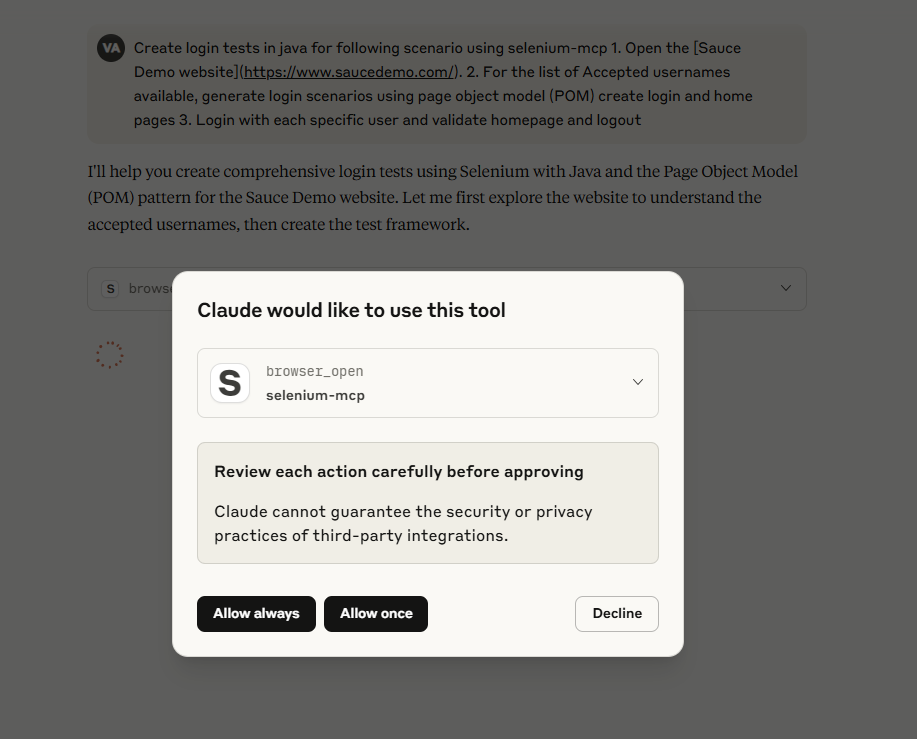
An example prompt to start AI Agent interaction:
Using selenium mcp tools, navigate to <https://parabank.parasoft.com/> click the 'Register' link and signup using dynamic test data and click register. Then generate selenium tests in <YOUR_FAVOURITE_PROGRAMMING_LANGUAGE> using pom, create tests using cucumber features, steps and execute the tests.
Note: For more prompts, look at examples directory of the project
🛠️ MCP Available Tools
Browser Management Tools
Cookie Management Tools
Window Management Tools
Element Interaction Tools
Element State Validation Tools
Frame Management Tools
Advanced Action Tools
Scrolling Tools
Form Interaction Tools
Element Locator Strategies
id: Find by element IDcss: Find by CSS selectorxpath: Find by XPath expressionname: Find by name attributetag: Find by HTML tag nameclass: Find by CSS class name
📋 Requirements
- Node.js: Version 18.0.0 or higher
- Browsers: Chrome, Firefox, Safari, or Edge installed
- WebDrivers: Automatically managed by selenium-webdriver
- Operating System: Windows, macOS, or Linux
🚦 Development
Getting Started
Clone the repository
git clone https://github.com/pshivapr/selenium-mcp.git
cd selenium-mcp
Install dependencies
npm install
Build the project
npm run build
Running the Server
Production Mode
npm start
Development Mode (with auto-reload)
npm run dev
Direct Execution
node dist/index.js
Using as CLI Tool
After building, you can use the server as a global command:
npx selenium-webdriver-mcp@latest
📝 License
MIT License - see LICENSE file for details.
🤝 Contributing
Contributions are welcome! Please feel free to submit a Pull Request.
- Fork the repository
- Create your feature branch (
git checkout -b feature/AmazingFeature) - Commit your changes (
git commit -m 'Add some AmazingFeature') - Push to the branch (
git push origin feature/AmazingFeature) - Open a Pull Request